Author Archives: Janice

About Janice

Janice Mansfield is a personal chef who specializes in creating customized Meal Plans and baking for people with food sensitivities. She also teaches cooking classes on Google+ through ChefHangout.com. She enjoys classic cocktails and created a line of cocktail bitters for no other reason than she wanted chocolate bitters in her Manhattans! In her spare time, she documents the antics and unbearable cuteness her two Shiba Inus over at Life in the Shiba Shack.

Five Favourite Kitchen tools

No matter how much time I spend in the kitchen or how many new tools I get to try out, there are a few things I fall back on as "essential tools"

1) microplane – I use mine for everything from lemon zest to grating nutmeg, to creating parmesan "snow"
2) a good knife that fits your hand!  doesn't need to have a price tag that breaks the bank, but should be good enough quality that it holds a decent edge.  Most importantly, it should fit your hand!  If you are on a budget, get yourself an 8" or 10" chefs knife or Santoku, and a paring knife to start.
3) my hinged citrus juicer! (sometimes referred to by bartenders as a Mexican elbow).  This does the most efficient job bar none of extracting juice from all kinds of citrus
4) French rolling pin – for rolling pastry, nothing beats the effectiveness of this simple design.  You can also use it to pound meat in a pinch, crush nuts, or soften blocks of butter!
5) parchment sheets! I buy these by the box, and use them for lining sheet pans for roasting all kinds of things, but also cut them in circles to line cake pans, fold them to make collars for assembling cakes or circling souffes.  You can also use 2 layers to roll out sticky pastries (very handy with gluten-free baking!) … and in a pinch, they can also be deployed into a piping bag. 

What are your kitchen "must-haves"?
#kitchentips   #blog  

Post imported by Google+Blog for WordPress.

Tips and Tricks: Burger Paper Hacks

There are a few things I take for granted in my kitchen: things that do double duty, or stand-in in a pinch, and sometimes, even provide me with a superior alternative!

Burger papers are one of those things!  Yes, those little 5.25″ x 5.25″ square sheets of parchment that you can buy for next to nothing at the restaurant supply warehouse!  I always have a box in the pantry for everything from wrapping caramels, to providing a clean base for the top of my scale, to separating fresh baked goods so they don’t stick together, to yes … even the mundane task of separating burger patties!

One of the recent burger paper hacks I’ve been employing lately is as a stand-in for muffin papers. You can buy the standard muffin cups with the accordion edges, but you really need to shell out for the better quality ones to bake gluten-free muffins in — otherwise they stick like nobody’s business.  AND they look a little pedestrian and “homemade”.   More recently, the fancier tulip papers have come on the market and become more widely available, BUT if you are consuming a lot of muffins, the costs add up.  A few months back, it struck me that these were really nothing more than parchment squares folded up.  And so, the DIY parchment muffin cup was born from burger paper squares!

To make this dead easy, find a cup (I found these disposable plastic cups fit PERFECTLY in a standard muffin tin!), turn it upside-down, place 2 papers slightly offset (you need 2 papers to make a stable enough cup to contain the muffin and propel its doughy rise upwards in the oven) on top of the base of the cup, and simply gather the paper around the cup with your hands to fold and crease it into shape …

… VOILA! you have a muffin paper!  Simply place it in your muffin tin, fill with your favourite muffin batter, and bake away!  These are greaseproof, and non-stick, and peel very easily away from even the stickiest of gluten-free muffins!

A Gluten-free Pie Cookalong!!!!

20121221_191859For those of you not active on Google+, take my word for it, there’s a lot of fun food things happening over there!  There were already a lot of people sharing photos of food in various states of preparation … and enjoyment, and the recent launch by Google of the communities feature has ratcheted things up a few notches for sure!  I’ve found the medium a great one not only for sharing what I’m doing, but searching for interesting things on whatever ingredient may have nabbed my interest.

For the past several months, Shinae Robinson has been hosting these cookalongs where she shares a recipe, and those interested cook the dish along with her, sharing pics and recipe tweaks along the way.  Sometimes, if its something traditionally Korean, she’ll bring her LAM into the picture to demo noodle massaging techniques :)

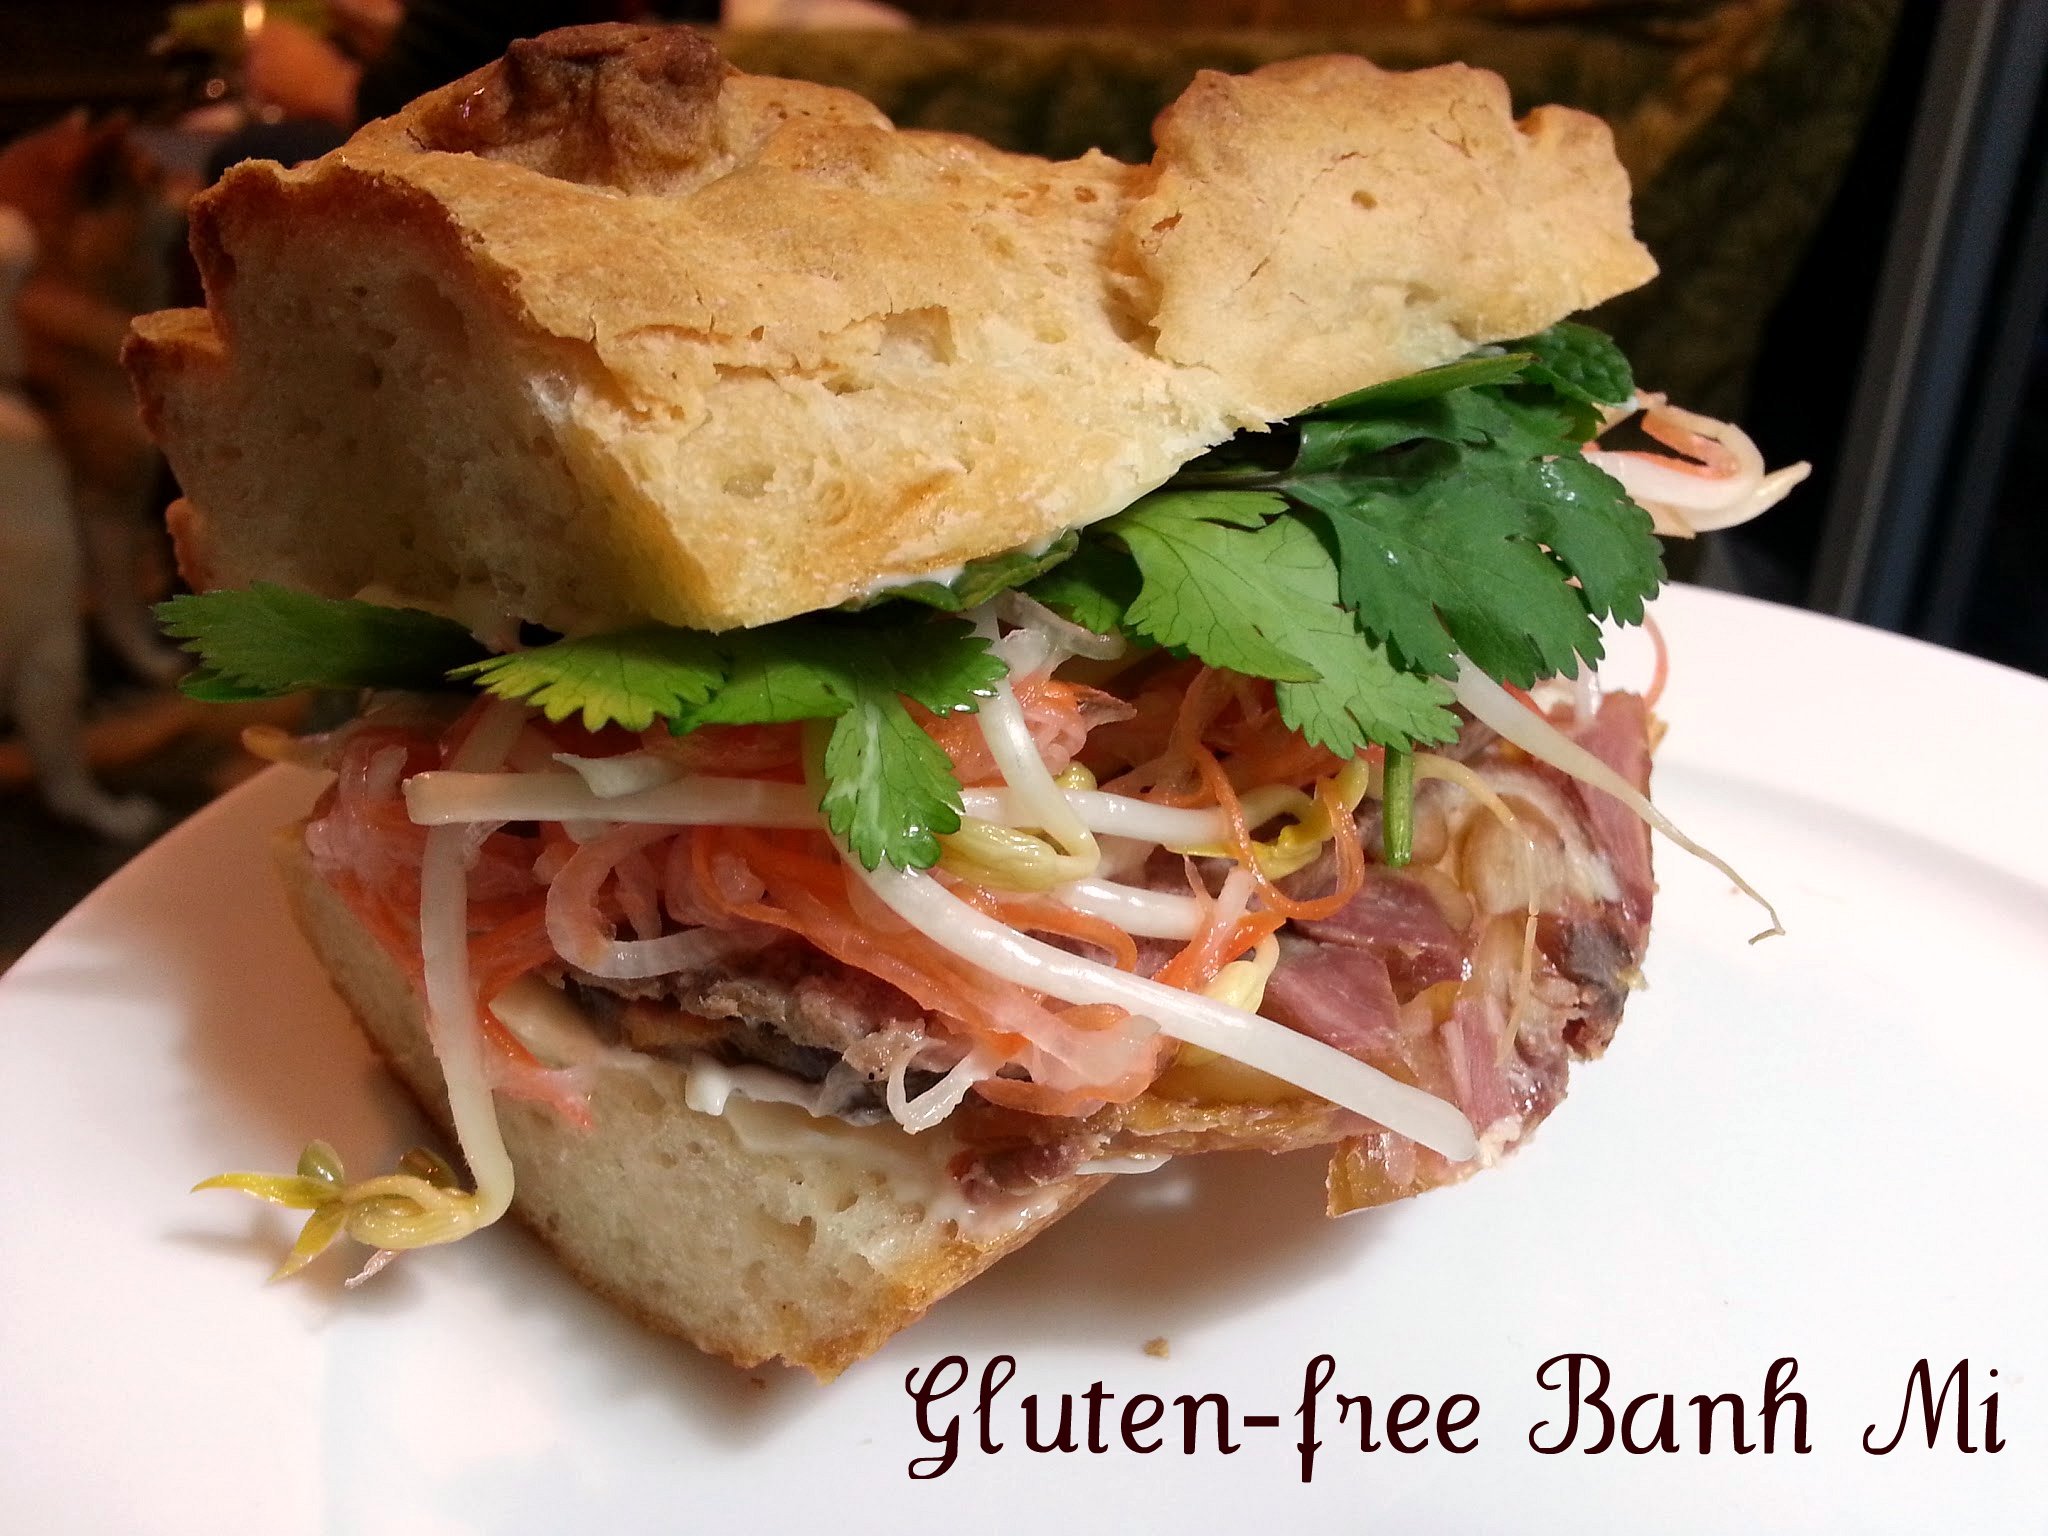
Well this month, I did a little inner squee when she asked if I would cohost the February cookalong on February 17th! something gluten-free!

FAQ for how the cookalongs is here: http://ridiculoushungry.blogspot.ca/p/cookalongs.html

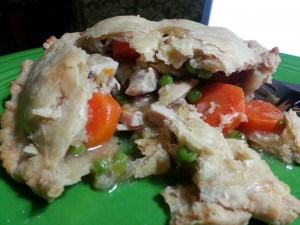
Since I’ve been making a lot of pie, and I love pie of all kinds, I figured I would do a gluten-free pie cookalong!  After the fact, I learned February is actually pie month, so for those of you who are into that kind of thing, you can just pretend this was premeditated pie synchronicity ;P

Anyhow, for this cookalong I’ll be sharing a basic pastry with you, which we are going to use for chicken pot pie OR tourtiere (a French Canadian pork-pie), and also for dessert — an apple crumble pie.  None of these are terribly difficult, but do be warned, the gluten-free pastry is a little more finicky than regular pie crust.  I’m going to try and get Jeffrey to take a video of the rolling out process early next week so you can see a couple of ways to roll things out.  The other tip as you go, is smaller pies are easier to manage for your first time!  so you might want to pick up a couple of 6″ aluminum pie plates and make a few smaller pies.

The one “must” ingredient for this cookalong is xantham gum.  While it is possible to make pie crust without it, it really is easier to make with it — it provides the stretch and binding you would normally find in wheat flour.  Once you’ve made a couple of pie crusts, I would encourage you to experiment with a couple of other binding options, but it really does require a deft hand and rolling pin.  Due to the increase in people doing gluten-free baking, you can find xantham gum in smaller quantities in most health food stores.  If you’re looking for other cool things to use it for, check out some of David Chang’s recipes in Lucky Peach :)

Finally, a word about gluten-free oats which we’ll be using for the Apple Crumble Pie.  Oats are one of those things that do not naturally contain gluten, but are a highly cross contaminated ingredient. Often oats are grown right beside wheat, and can get contaminated in the field.  They are also usually harvested with the same combines that harvest wheat, and are ground and packed in mixed facilities.  To produce gluten-free oats therefore requires a collective of decidated growers, who are using dedicated equipment right from harvesting through milling and packaging.  There are few good quality products out there, including Bob’s Red Mill, Montana Gluten-free Processors, Lara’s Oats by Cream Hill Estates, and Only Oats from Avena Foods here in Canada.  For those of you preparing these for someone who is Celiac, please check with them to see that they can tolerate oats.  Even though these dedicated products test their products, not all Celiacs are able to tolerate them.  Other options for the rolled oats include Soy Flakes, or Buckwheat Flakes.  Brown rice flakes   produce a stiff-textured crisp, and Quinoa flakes, while tasty, are too finely textured to stand up in a crisp.

On the day of the cookalong, I’ll be hanging out holding “office hours” in the early afternoon for those of you with questions.  I hope you can join us on Feb 17th!  Let’s make pie!

Gluten-free Pie Crust

Yield: crust for 1 double crust 9\" deep dish pie.

Ingredients

  • 1 cup amaranth flour (or finely milled brown rice flour)
  • 1 cup tapioca starch
  • 1 cup cornstarch (or potato starch)
  • 2 Tablespoons granulated sugar (omit if making savoury crust)
  • 1 1/2 teaspoons baking powder (optional)
  • 1 1/2 Tablespoons xantham gum
  • 1 1/2 teaspoons sea salt
  • 1 1/2 cups butter or shortening, cut in small pieces
  • 1 eggs (or 1/4 water if making eggless)
  • 2 teaspoons cider vinegar

Instructions

  1. Pastry (prepare in advance)
  2. Combine all the dry ingredients in a medium bowl and mix well. Cut in the butter or shortening with a pastry blender until the mixture resembles dry oatmeal. Combine the egg and vinegar, and add slowly to the mixture until the pastry is moistened. If you are not using egg, use 1/4 cup water (or slightly more as needed) instead/
  3. If making in the food processor, combine all dry ingredients and pulse to mix well. Add the butter or shortening, and pulse until the mixture resembles oatmeal. Add the liquid ingredients slowly, pulsing until the mixture comes together in a ball.
  4. Form into a ball and cover with plastic wrap Let it rest in the refrigerator for at least 30 minutes before rolling out.
  5. When rolling, dust the surface with amaranth flour. It is easiest to roll out on a silicone mat, or between two sheets of plastic wrap.
  6. Pastry can be kept in the fridge, well wrapped for up to 1 week, or rolled and frozen.
http://realfoodmadeeasy.ca/2013/02/a-gluten-free-pie-cookalong/

.

Chicken Pot Pie

Yield: Makes 4-5 6\" double-crusted pot pies or 1 large pie

Ingredients

  • 1 Recipe Gluten-free Pastry Crust (prepared in advance)
  • 2 T grapeseed oil
  • 3 cloves garlic, minced
  • 1/2 cup celery, finely diced
  • 1 medium onion, diced
  • 1 cup carrot, diced
  • 1 cup vegetables of your choice, diced or cut into 1" pieces (this can include bean, zucchini, peppers...)
  • 1 cup peas (frozen is fine)
  • 1 1/2 lb boneless chicken (thighs are best, but chicken breast also works fine)
  • 2 tsp Herbs de Provence
  • 1 bay leaf
  • salt and pepper
  • 1/2 white wine or vermouth
  • 1/2 cup water
  • 1/4 cup water combined with 1 T cornstarch or tapioca starch

Instructions

  1. Season your chicken pieces with salt and pepper on both sides.
  2. Heat your saute pan over medium-high heat. Add the grapeseed oil and heat for 30-60 seconds until it just starts to shimmer.
  3. Add the onions with a pinch of salt, and stir to avoid scorching. Cook for 2-3 minutes until the onion just begins to turn translucent. Add the garlic and celery, and continue to cook until the onions are soft and beginning to soften.
  4. Turn the heat down to medium.
  5. Add the other vegetables except for the peas, and add the vermouth, and water, and Herbs de Provence and bay leaf. Taste and season with salt and pepper as needed.
  6. Place the chicken pieces on top (flatten out the boneless thighs if you are using them), and place a lid on the pan. If your chicken pieces are thin, turn after 5 minutes, and cook for a total of 10-15 minutes.
  7. Remove the chicken from the pan, slice thinly and hold in reserve.
  8. You should have approximately 1 cup or slightly more of liquid. Remove the bay leaf, turn the heat back up to medium-high. Add the frozen peas and cook until just thawed. Then stir in the starch/water mixture, stirring everything until the gravy thickens. Add the chicken pieces back in and stir to evenly distribute. Let cool before filing your pies.
  9. To make the pies:
  10. Preheat the oven to 425 degrees
  11. Roll out the pastry, and line the bottom half of 4 6" pie plates with pastry. Some overhang is good and will help you seal the pie crust. Roll out 4 additional pastry circles for the top and hold in reserve.
  12. Fill each pie with approx 1 cup of chicken filling. moisten the edges of the pie crust, and place the top circle on each. Press down around the edges, and work your way around to trim and crimp. Slash a few vent holes in the top of each crust. Brush with egg wash to get a shiny crust. (a good non-egg option is cooked tapioca gel).
  13. Place the pies on a heavy baking sheet, and bake for 20-25 minutes on the lowest rack in the oven. The pie filling should be starting to bubble when done, and the crust lightly browned.
http://realfoodmadeeasy.ca/2013/02/a-gluten-free-pie-cookalong/

Gluten-free Tourtiere

Yield: Makes 4-5 6\\\" tourtieres or 1 large tourtiere

Ingredients

  • 1 Recipe Gluten-free Pie Crust
  • 1 T grapeseed oil (or other neutral oil)
  • 2 cups onion diced
  • 3 cloves garlic, minced
  • 1 ½ cups peeled & diced potatoes
  • 1 ½ pounds ground pork
  • 1 cup carrot, peeled and diced
  • 1 apple, peeled and finely diced
  • 2 bay leaves
  • 1 tsp fine salt
  • ½ tsp ground black pepper
  • ½ tsp ground allspice
  • ½ tsp cinnamon
  • pinch ground cloves
  • 1 cup water as needed

Instructions

  1. Heat a 12” saute pan over medium-high heat. Add the grapeseed oil and heat for 30-60 seconds until it just starts to shimmer.
  2. Add the onions with a pinch of salt, and stir to avoid scorching. Cook for 5 minutes until the onion just begins to turn translucent. Add the garlic and continue to cook until the onions are soft and beginning to soften.
  3. Turn the heat down to medium.
  4. Add the pork, and saute, stirring until the meat begins to brown. Add the remaining ingredients and stir to combine. Taste and adjust the seasoning as you go. Cook uncovered adding 2-3 T more water if needed to keep things moist. Cook until the potatoes and apples are soft and the potatoes are beginning to thicken the mixture.
  5. Let the filling cool before making your pies.
  6. To make the tourtieres:
  7. Preheat the oven to 425 degrees
  8. Roll out the pastry, and line the bottom half of 4 6" pie plates with pastry. Some overhang is good and will help you seal the pie crust. Roll out 4 additional pastry circles for the top and hold in reserve. If you want to make 1 larger tourtiere, use a 9” pie plate OR an 8” springform pan.
  9. Fill each pie with approx 1 cup of tourtiere filling. Moisten the edges of the pie crust, and place the top circle on each. Press down around the edges, and work your way around to trim and crimp. Cut out a central vent holes in the top of each crust. Brush with egg wash to get a shiny crust. (a good non-egg option is cooked tapioca gel).
  10. Place the pies on a heavy baking sheet, and bake for 20-25 minutes on the lowest rack in the oven. If you are making a large tourtiere, increase the baking time to 40-45 minutes, decreasing the temperature to 350 degrees after 20 minutes. The pie filling should be starting to bubble when done, and the crust nicely browned.
http://realfoodmadeeasy.ca/2013/02/a-gluten-free-pie-cookalong/

Gluten-free Apple Crumble Pie

Yield: makes 1 large 9\" deep dish pie

Ingredients

  • 1/2 Recipe Gluten-free Pie Crust
  • 8 cups apples, peeled and diced
  • 1/2 cup granulated sugar
  • 2 T tapioca starch
  • 1 tsp cinnamon
  • 1 tsp ground coriander
  • 1/4 tsp freshly grated nutmeg
  • 1 cup gluten-free oats (Bob's Red Mill makes a good one)
  • 1 cup gluten-free all-purpose flour mix
  • 1 cup brown sugar, lightly packed
  • 1 cup unsalted butter or margarine chilled and cut into small pieces

Instructions

  1. Preheat oven to 375 degrees.
  2. Roll out the pie crust and line a 9" pie plate with a bottom crust. Flute the edge and place in the refrigerator until you are ready to fill it.
  3. Meanwhile, peel and dice your apples into a large bowl. Add the sugar, spices, and starch and toss well to combine. Pour into the pie plate and arrange the pieces so there are no spaces.
  4. In the same bowl, combine the oats, flour, and brown sugar and mix well to combine. Cut in the butter, and work it with a pastry blender (or your fingers!) until the butter is no larger than pea-sized. Gently arrange the crumble filling on top of the apples.
  5. Bake the pie in a 375 degree oven for 45 minutes until the apples are soft and starting to bubble. If the crust begins to brown too much, shield it with a foil collar.
  6. Let cool for 15-20 minutes before digging in!
http://realfoodmadeeasy.ca/2013/02/a-gluten-free-pie-cookalong/


Gluten-free Banh Mi … for your Superbowl Party!

20130131_173306Another February is upon us, and with it, comes Imbolc … that time of year exactly midway between the Winter Solstice and Spring Equinox when the days start to get longer, sun-seeking rodents (Wiarton Willie for those of us here in Canada), and for sports fans … Superbowl Sunday!

This weekend has become something of a gathering point for folks — even those who aren’t sports fans.  Perhaps its because we’re edging out of winter and need an excuse to gather and eat, perhaps its just because the festivities of Christmas are just far enough behind us to be fond memories.  Whatever the reason, “The Big Game” has become a traditional rallying point, replete with all manner of meaty treats and finger food.

Unfortunately for those avoiding gluten, it can feel like there is little choice available.  Many of the boxed treats come pre-breaded and fried, dips are served with bread or wheat-crackers, and even if gluten-free options are available, it can be a nightmare of cross-contamination!  So what to do?!  Banh mi is a great party-food option, and its quite easy to make gluten-free!  All of the typical fillings are easy to purchase or make in advance, and I’ve got a bread recipe that requires no special mixer, and works well as a French Bread roll!

I’ve served banh mi as a party food at a couple of catered events I’ve done, and people really like being able to pick and choose their toppings.  For those limiting their carb intake, they can opt for an open-face version.  Just remember, its that magical combination of cured meats, with the crisp sweet/sour zing of the pickle, and the crunch of cucumber all together that make these such a satisfying snack option.

Typical meat fillings include:

  • pork terrine or pate (if you get a good quality one from a local charcuterie, it should have NO fillers — but always ask about ingredients and production!)
  • headcheese, or my favourite trotterbrawn
  • meatloaf – you can make this ahead of time, with asian spices.  If you want to add filler while keeping it gluten-free, just use gluten-free bread crumbs, or my favourite, cooked quinoa!
  • thin-sliced cold cuts (my favourite — but not at all traditional, is Mortadella!)
  • BBQ pork
  • sliced omlette
  • marinated and sauteed chicken
  • marinated and braised tofu

Other toppings that are traditional:

  •  pickled carrot and daikon (shred equal amounts of carrot and daikon. For every 1 c, add 2 T rice vinegar, 2 T sugar, and 1/2 tsp salt)
  • cilantro sprigs
  • mint leaves
  • other herbs such as basil
  • cucumber slices

and finally, the condiments

  • traditional banh mi has a slathering of plain old mayonnaise – NOT aoil, and NOT gussied up mayonnaise with fish sauce in them.  Basic banh mi actually start with mayonnaise cut with softened butter, BUT I have to say I really like the Japanese squeezy-bottle mayo in mine — its a little bit sweet and a little bit tangy which plays well off the rich meats.

So finally, dear folks we get to the bread, which is the crux of the banh mi.  While we won’t be making something that is as feathery and light as the traditional wheat/rice french bread rolls that are typical of some of the best banh mi, we will be making something that is nice and soft when fresh or toasted in the oven, AND completely gluten-free.   For those of you looking for something a little more wholesome, I’ll have a whole-grain version for you in the next blog post, with amaranth, sorghum and millet flours.  This bread is done as a no-knead style bread — while it won’t be quite as fluffy as a more delicate bread, it will still be plenty soft on the inside, with a bit of a chewy crust on the outside.  You will mix the dough, cover with plastic wrap and walk away for about 2 hours, then form the loaves or buns, let rise another 30-45 minutes and bake.   By trading time for effort, you are allowing the gum and flours to fully hydrate, which, fwiw, takes more time than wheat breads.

So here you go, French bread for all!  I hope you and yours have a great game-day :)

Gluten-free French Bread

Yield: 2 french bread loaves, or between 4-6 individual buns

... for your Banh Mi Superbowl Party!

Ingredients

  • 1/2 cup sweet rice flour
  • 1/2 cup white rice flour (finely ground)
  • 1/2 cup almond flour
  • 1 cup brown rice flour
  • 1 cup tapioca starch
  • 1 T xantham gum
  • 1 tsp seasalt
  • 2 T sugar or honey (honey will help keep the rolls moister)
  • 1 tsp baking powder (optional)
  • 2 1/2 instant yeast
  • 2 eggs, whisked
  • 1 1/2 cups water
  • 1 tsp cider vinegar (optional)

Instructions

  1. Combine all the dry ingredients in a large bowl and whisk to combine
  2. Make a well in the centre and add the wet ingredients. Whisk them all well to combine before beginning to incorporate the dry ingredients.
  3. Stir and fold everything together until it comes together. Give it a couple more stirs, and then cover with plastic wrap.
  4. Let rise for 2 hours at room temperature.
  5. Line a French bread pan with parchment paper. Scoop out the dough into the pan the length of the loaf you want, and smooth out the top and sides with a wet spatula. Cover with plastic wrap and let rise another 30-45 minutes.
  6. 10 minutes before you are ready to bake, Preheat the oven to 425 degrees.
  7. Remove the plastic wrap and slash the tops of the loaves -- this will help control the direction in which they expand in the oven.
  8. Bake on the lowest rack in the oven at 425 degrees for 30-35 minutes. The loaves should be browned, and register 205F internally,
  9. Let cool in the pan 5 minutes, then remove to a cooling rack -- they will be ready to slice and eat after 30 minutes of cooling.

Notes

to make this loaf egg-free, simply omit the eggs, and add 1 tsp pectin powder to the dry ingredients (I use Pomona's pectin, and for baking just mix the contents of both pouches). Also increase the amount of water to the mix by about 1/2 cup.

http://realfoodmadeeasy.ca/2013/02/gluten-free-banh-mi-for-your-superbowl-party/

Banana Bread for all!

Gluten-free banana bread… or Banana Bread redux

I know I have another banana bread recipe on the website here, BUT it has a major shortcoming in that it uses an ingredient that is a little hard to source — Timtana flour.  For those of you who can get it, by all means use the other recipe, but for those of us here in Canada, with shipping, it creeps into the realm of silly expensive to keep in the pantry.  As an aside, it really is a wonderful flour — one of the few that makes a really tasty loaf of bread with fabulous texture with no additional starches!

… and so, I present you with Gluten-free Banana Bread redux.

There’s a couple of things going on here to help make a nice springy-yet-moist loaf (after all, moist IS what its all about with banana bread!).  I like mine plain-jane, relatively unadorned.  For those of you avoiding refined sugar, this would be an awesome area to substitute honey for the sugar (use about 1/2 cup of honey and increase the quinoa flakes by about 10 grams to compensate).  I’ve done a couple of things to get the structure and spring the Timtana flour imparts: 1) I’ve used teff flour as it is fairly high protein, and has a great flavour; and 2) I’ve used quinoa flakes to add some nutrition and help with the structure of the loaf.

When you mix this up, it will look a little moister than a wheat-based banana loaf, but after about 45 minutes in the oven, you will see the centre start to push up and cook through.  This will take a minimum of 60 minutes in the oven, so plan accordingly!

Banana Bread for all!

Prep Time: 20 minutes

Cook Time: 1 hour

Yield: 1 standard loaf

Ingredients

  • 60 grams teff flour
  • 40 grams quinoa flakes
  • 128 grams cornstarch
  • 30 grams almond flour
  • 1 tsp xantham gum
  • 3/4 tsp baking soda
  • 1/2 tsp salt
  • 1/2 tsp freshly grated nutmeg
  • 3 large ripe bananas mashed well
  • 1/4 cup yogurt (non-dairy yogurt works equally well here, but if you are using coconut milk yogurt, reduce the quinoa flakes by about 10 grams)
  • 2 large eggs, beaten
  • 6 T neutral tasting vegetable oil such as grapeseed oil
  • 3/4 cup evaporated cane juice or granulated sugar
  • 1 1/2 tsp vanilla extract
  • 1/2 cup chocolate chips (optional)
  • 1/2 cup chopped hazelnuts (optional)

Instructions

  1. Preheat oven to 350 degrees
  2. Grease an 8 1/2" x 4 1/2" loaf pan
  3. Combine the dry ingredients in a medium bowl and mix well with a whisk to combine.
  4. Combine the wet ingredients in a larger bowl and mix well to combine and slightly aerate the eggs. Add the dry ingredients and mix with a spatula.
  5. Spoon the batter into the loaf pan. It should be loose but not too runny.
  6. Bake at 350 degrees for at least 60 minutes until a toothpick inserted in the centre comes out with only a few moist crumbs clinging.
  7. If you prefer a pretty loaf, you can slash the top with a serrated knife to control the expansion.
  8. Cool in the pan for 10 minutes before removing to a cooling rack. Let the loaf cool completely before slicing.
http://realfoodmadeeasy.ca/2013/01/banana-bread-for-all/

Gluten-free Rugelach

Those of you who follow me over on Google+ may have heard of Shinae Robinson’s monthly cookalongs – a really cool virtual gathering of people preparing food that she began a while back to share recipes and preparation methods.  If you haven’t joined in one yet, you definitely should!

December’s cookalong was chicken and dumplings, rounded out with rugelach, and happened last Sunday (yesterday as of this post).  I’ve been a bit tied up with baking and catering, so couldn’t join in the fun during the day, but was getting hungry checking in on some of the pictures along the way, and the rugelach in particular was looking quite Christmas-ey and delicious (and let’s face it, what’s not to love about flakey, cream cheese-ey pastry!).  When I had a chance to check out this recipe that everyone was working off, it looked like it would be fairly straightforward to convert to gluten-free … so thats what I spent this afternoon doing!

A couple of notes … I figured that treating this like pastry rather than a cookie would give the best results.  Traditional rugelach are tender yet flaky, and my go-to recipe for gluten-free pastry already has a pretty good flavour profile.  So, I made the dough in the food processor — cream cheese first, butter after to ensure some larger chunks remained.  I also added sugar to the dough — it might seem like a lot, but it adds tenderness and moisture to the dough, and helps with browning.  Finally, like pastry, I started the rugelach off in a slightly hotter oven, and decreased the temperature to 350 to finish baking.

Gluten-free Rugelach

adapted from Gourmet, May 2004 recipe

Ingredients

  • 2/3 cups amaranth flour
  • 2/3 cups cornstarch
  • 2/3 cups tapioca starch
  • 1/2 cup granulated sugar
  • 1 T xantham gum
  • 1/2 tsp salt
  • 1 tsp baking powder
  • 1 cup unsalted butter, chilled and cut into cubes
  • 8 oz cream cheese, softened
  • approx 1/4 cup cold water or enough to moisten the dough
  • 1/2 cup sugar
  • 1 tsp cinnamon
  • 1 cup apricot preserves
  • 1 cup raisins or currants
  • 1 cup walnuts or pecans, chopped
  • milk or eggwash for brushing the rugelach

Instructions

  1. Combine all the dry ingredients in the bowl of a food processor, and pulse to mix everything thoroughly.
  2. Cut the cream cheese into small cubes, and add to the bowl of the food processor. pulse to combine. Cut the butter into small cubes and add to the food processor. Add a small amount of cold water to the mixture, just until it forms a ball.
  3. Gather the dough into a ball and wrap in plastic wrap. Chill for 8 hours (or overnight).
  4. Cut the dough into 4 pieces -- you are going to make 4 rugelach.
  5. Combine the 1/2 cup sugar and cinnamon in a small bowl and mix well.
  6. Preheat the oven to 425 degrees. Line a baking sheet with parchment paper.
  7. Shape each piece of the dough into a rough rectangle, and roll out just like you are rolling a pie crust - about the same thickness. You should have a 12-inch square. Roll between two pieces of plastic wrap to help you out.
  8. Spread a quarter of the preserves on the dough with an offset spatula, sprinkle with a handful of raisins and a handful of chopped nuts, and sprinkle with 1-2 Tablespoons of cinnamon sugar.
  9. Roll loosely like a jelly roll (use the plastic wrap!). Place the roll onto the baking sheet, seam side down. Brush each log with milk or egg wash, and sprinkle with the remaining cinnamon sugar. Slash each log halfway down, crosswise about 1-inch apart. Place in the fridge for 20-30 minutes to firm up the roll.
  10. Bake at 425 degrees for 10 minutes. Lower heat to 350 rand bake for 15-20 more minutes.
http://realfoodmadeeasy.ca/2012/12/gluten-free-rugelach/


Gluten-free focaccia

This is a quick share … I’ve been working on a recipe to create nice crunchy foccacia crumbs, and along the way decided to modify the recipe a fair bit to use as a side with dinner.  Its still a work in progress — lovely and soft out of the oven, but needs toasting  the second day in.  I’ve baked this in small ring molds to get the buns pictured here, but this also makes 1 round (8″ or 9″ round pan — heavy stoneware works best), just increase the baking time by about 10 minutes.

the other thing I’ve been playing with is bread recipes that don’t require a stand mixer or any special equipment other than a bowl, a whisk and a spatula.  This doesn’t quite produce the nice fine texture that I get for my sandwich loaf, but does a passable job for very little effort. If you make this, let me know how it works out!  While the list of ingredients looks long, it comes together quite quickly.

  • 1/2 cup brown rice flour
  • 1/4 cup garfava flour
  • 1/4 cup light buckwheat flour
  • 2 T millet flour
  • 1/2 cup potato starch (or cornstarch)
  • 1/2 cup tapioca starch
  • 2T sweet rice flour
  • 2 1/4 tsp instant yeast
  • 1 tsp baking powder
  • 3/4 tsp xantham gum
  • 3/4 tsp guar gum
  • 1 tsp sea salt
  • 1 T sugar or honey
  • 1 tsp pectin
  • 1 c warm water
  • 2 eggs
  • 3 T extra virgin olive oil
  • olive oil, coarse salt, and rosemary for the top
  1. Combine all the dry ingredients in a medium bowl and whisk well to combine everything
  2. Make a well in the centre, and add the liquid ingredients, whisking to combine before incorporating the dry ingredients. This will make a thick batter that you should be able to stir with a sturdy spatula.
  3. Cover and let rise for at least 60 minutes, or until doubled in volume.
  4. Scoop out the dough into greased ring molds or a heavy round pan, trying not to deflate the dough too much,
  5. Preheat the oven to 425 degrees
  6. Dimple the dough with wet fingers, and drizzle the top with a bit of good quality olive oil. Cover and let rise another 30 minutes while the oven preheats.
  7. Just before the focaccia buns go in the oven, sprinkle the top with coarse salt and rosemary.
  8. Bake for 15-18 minutes, until the internal temperature registers 205 degrees. (bake for 25-30 minutes if making a larger focaccia).
  9. Let cool in the rings (or pan) for about 10 minutes before removing to a cooling rack.


Chocolate marshmallows!

The holidays are fast approaching, and people are looking for something a little sweet and treat-like to indulge in, and I’ve been making marshmallows like a mad fiend here at the Shiba Shack, and will be continuing to make them for special orders right through to Xmas.

Folks who have never had a marshmallow are particularly dazzled when they try a homemade marshmallow — the texture is something special, and the flavor is so much more nuanced than a jet-puft out of a bag.

Most of the flavours you might think of can easily be made as variations on a basic marshmallow recipe — they can be made with egg whites or not (pasteurized egg whites from a carton are just fine).  Here’s the one I like to use … a recipe published years ago in Gourmet magazine … (I still refer occasionally to the dog-eared copy of the magazine!).

Chocolate marshmallows  however, are a slightly different beast.  You still need to achieve that delicate balance of gelatin, heat, sugar and air, but the cocoa solids really do throw a monkey wrench into the works!  It is possible to just swirl in cocoa powder at the end of the process, but that never seemed like a satisfying solution to me, and leaves a bit of a sharp cocoa flavour IMO.  I want marshmallows that are soft and comforting, with a mellowness to them that is reminiscent of a cup of hot cocoa … and to do that means integrating the cocoa early on the in process.  Cocoa solids present 3 challenges here:

  1.  cocoa solids are heavy and oily, naturally countering the fluffiness you are building
  2. good cocoa flavour can be achieved with “regular” i.e. non Dutched cocoa, BUT needs some acidity to counterbalance things and bring out the best flavour
  3. cocoa absorbs a heck of a lot of moisture.

My other criteria here was I really wanted to be able to fill a 9×13 pan with fluffy marshmallows that were at least 1″ tall … a minor quibble, but if you are going to the trouble of making marshmallows, you might as well reap maximum rewards, right? ;)

So the final recipe ended up with a few modifications that make a lot of difference.  I’ve used what looks like a lot of gelatin here, BUT it is necessary to provide structure and counterbalance the density of the cocoa powder.  I’ve also used honey because it is a natural humectant and will offset the drying tendencies of the cocoa, AND because it is also acidic.

And, without further ado, here’s the recipe!  If you make it, PLEASE follow the directions precisely … candymaking is all about precision.  You need to use a candy thermometer for this (unless you are the candy whisperer and can tell exactly from the sound of the bubbling sugar when it hits the soft-ball stage!).  You also need a stand mixer for this one, as this will need to be whippped for at least 12 minutes, maybe more depending on conditions in your kitchen.  If it has not cooled sufficiently, you will get condensation forming on the bottom of your chocolate marshmallows — NOT cute in the least!

Chocolate marshmallows!

Yield: one 9x13 pan

Chocolate marshmallows guaranteed to hit the spot!

Ingredients

  • 1/2 cup cocoa powder
  • 1/2 cup boiling water
  • 4 T gelatin
  • 1/2 cup water
  • 2 cups sugar
  • 1/2 cup light corn syrup (or invert sugar)
  • 1/4 cup honey
  • 1/2 cup warm water
  • pinch of salt
  • 2 tsp vanilla extract
  • 2 large egg whites (or 60 ml of pasteurized egg whites)

Instructions

  1. Prepare a 9x13" pan by lightly oiling and dusting liberally with a mixture of 50% cornstarch and cocoa powder OR 50% cornstarch and icing sugar.
  2. Bloom the cocoa powder in 1/2 cup boiling water in a small bowl. It will form a thick paste ... stir well and set aside.
  3. Bloom the gelatin in 1/2 cup cold water in the bowl of a stand mixer. Set aside for 15 minutes.
  4. Meanwhile, combine the sugar, corn syrup, honey, salt and warm water in a 2 or 3 quart saucepan. Bring to a boil over medium heat-high heat, swirling rather than stirring, until the mixture registers about 242 F.
  5. Add the cocoa paste to the bowl of the mixer.
  6. Take the syrup off the heat, and immediately add to the bowl of the mixer. Using a metal whisk, stir everything together until well combined, and the gelatin has fully dissolved.
  7. Add the whisk attachment to your stand mixer and place on medium speed for 2 minutes. (Mine has settings up to 12, and I start on 6). Increase the speed slightly -- I move mine to 8 -- and continue whisking for at least 8 minutes. You should see an increase in volume . Similar to egg whites, you want to build structure on a lower speed and then increase the speed to achieve volume.
  8. While the gelatin-syrup mixture is whipping, beat your egg whites with a hand mixer to stiff peaks. Do not overbeat at this point (you can also do this ahead of time in the stand mixer and hold in a bowl until you need them... add a pinch of cream of tartar if you do)
  9. Feel the side of the bowl of the stand mixer. If it is still warm to the touch, continue to beat for another 2 minutes or so ... in my mixer, this process normally takes at least 12 minutes in total. Add the beaten egg whites and mix for 1 more minute.
  10. With an oiled spatula, work quickly and pour/spoon the marshmallows into the prepared pan. smooth out the top as best you can. Dust the top with the same mixture you used to dust the pan, and let sit undisturbed for 6 hours or longer -- overnight is fine. You want these to continue cooling completely and set up.
  11. When the marshmallows are set up, using the same mixture you dusted everything with, cut the marshmallows into whatever shape you desire, dusting all the cut edges as you go.
  12. Store in an airtight container for 2-3 weeks.
http://realfoodmadeeasy.ca/2012/11/chocolate-marshmallows/


biscuits

… the best Gluten-free biscuits!

While we have a number of tried and true recipes here at the shiba shack its fair to say we’re always tweaking and tinkering in the interests of improvement.

So tonight, when needing biscuits to go with the stew, we made a couple of flour swaps with the ones normally used – not too many but enough that they went down really well.  These are intended to be nice and flaky, delicate biscuits — the kind that almost shatter…

… but its late, and y’all want your biscuit recipe PDQ, so  lets get to it!


… the best Gluten-free biscuits!

Yield: 9-10 biscuits

… the best Gluten-free biscuits!

Ingredients

  • 3/4 cup cornstarch
  • 1/4 cup sweet rice flour
  • 1/2 cup millet flour
  • 1/2 cup brown rice flour
  • 1 1/4 tsp xantham gum
  • 1/2 tsp sea salt
  • 3 tsp baking powder
  • 1 tsp baking soda
  • 1 stick butter (substitute Earth Balance shortening to make dairy-free)
  • 1 cup buttermilk (substitute 1 cup clabbered almond milk to make dairy-free)

Instructions

  1. Preheat oven to 425 degrees F.
  2. Combine all the dry ingredients in a medium bowl, mixing well with a whisk to combine. Cut in the butter with a pastry cutter or two knives, until the mixture resembles oatmeal. Some slightly larger pieces of shortening are good.
  3. Add the buttermilk and mix with a spatula until just moistened and the mixture comes together. Dust a silpat mat (or plastic wrap coated countertop with sweet rice flour, turn out the dough onto the silpat, and give it a couple of turns, kneading very lightly. The dough will feel very soft and moist — resist the urge to add more flour!
  4. Pat the dough out with floured hands to 3/4" thick, and cut into 3-inch biscuits. Place the biscuits on a parchment lined baking sheet.
  5. Bake at 425 degrees for 20-22 minutes. Let cool at least 15 minutes before eating.
http://realfoodmadeeasy.ca/2012/09/the-best-gluten-free-biscuits/


stuffed zucchini

eat ALL the zucchini!!!!

As we approach late September, very few people are saying this with gusto right about now!  Its zucchini overload time, and well-meaning folk are quietly slipping out the back door of neighbourhood potlucks rather than leaving themselves open to being foisted with yet another marrow squash on saying goodbye to the hosts! (“all over North America, this same scene is playing out … “no really, we INSIST! you simply have to taste our zucchini this year! Its a rare Italian heritage variety!” …)

When you tire of zucchini noodles for salad, and zucchini bread and zucchini muffins, and your best efforts to quell the onset on young zucchini by eating the blossoms has been foiled by those couple of zucchini now the size of baseball bats — that were hiding in plain view – there is always the tried and true stuffed zucchini to fall back on!

This is a great option, as the stuffing is really whatever you choose to make it — with or without a binder, and with whatever vegetables and seasonings strike your fancy.

For this round, I used some rice (because that is what was in the fridge), ground bison,  lots of tomatoes and garlic, and chili powder and cumin.  Leftover filling for this will go quite nicely in quick fajitas for lunch, or heated up as-is with a bit of cheese on top.  Leave out the rice, and you have a paleo-friendly meal.  Add quinoa instead of rice if that’s your thing, or even add bulgur if you eat wheat.  Lamb instead of beef, with lots of fresh lemon zest, mint and zaatar would be fabulous.  You can see the possibilities are endless, so I’ll stop there!  Stay tuned for the next iteration of “eat ALL the zucchini”! I have an idea for zucchini jam :) — SRLSY!

eat ALL the zucchini!!!!

eat ALL the zucchini!!!!

Ingredients

  • 1 T grapeseed oil or olive oil
  • 2 large zucchini, about 12" in length and 1 1/2" in diameter
  • 300 grams ground bison
  • 1 cup finely diced leeks
  • 3 large cloves garlic, minced
  • 1/2 cup celery, finely diced
  • 1/2 cup carrot, finely diced
  • 1/2 cup red pepper, finely diced
  • 1/2 cup zucchini finely diced
  • 4 roma tomatoes, finely diced
  • 2 T chili powder
  • 1 tsp cumin
  • 1 tsp coriander
  • 1 tsp sea salt
  • 2 cups cooked rice
  • 4-5 large basil leaves, chiffonade
  • 1 cup grated Monterey Jack cheese (optional)

Instructions

  1. Preheat oven to 400 F.
  2. Preheat a large sautee pan to medium-high.
  3. Place the oil in the hot pan, and add the leeks, celery, carrots, and a pinch of salt, and sautee for 1-2 minutes until the onions just begin to soften.
  4. Add the garlic and sautee 1 minute more. Then add the chili powder, cumin and coriander, and allow the spices to toast slightly. Add the bison, and sautee until it begins to brown slightly. Add the remaining vegetables, salt and pepper, and about 1/4 c of water to prevent sticking. Reduce heat to medium-low, and cook for 8-10 minutes until the tomatoes are softened and breaking down.
  5. Add the rice, and stir well to bread up any clumps. Cook, covered for another 2-3 minutes to allow the rice to absorb some of the flavours, and finally stir in the basil off the heat.
  6. While the filling is cooling slightly, cut the zucchini in half lengthwise, and scoop out the seeds to make a trough. Fill the zucchini with filling. Top with grated cheese if desired. Bake at 400 degrees for 25 minutes.
http://realfoodmadeeasy.ca/2012/09/eat-all-the-zucchini/