I know I promised the gluten-free bagel recipe, but am still double checking my measurements before putting the recipe out there for y’all. In the [...]]]>
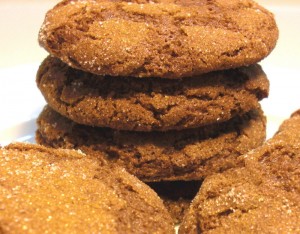
I know I promised the gluten-free bagel recipe, but am still double checking my measurements before putting the recipe out there for y’all. In the meantime, here’s a little gluten-free, dairy-free treat to get you feeling all Yuletide-ey. These are simple enough that you can do all the mixing by hand — the Earth Balance softens to a quite workable texture. You can also use butter if you are eating dairy — just make sure its softened at room temperature for a while.
These are rolled in sugar and get a nice crackled top when baked. Try them out — you won’t believe they’re not gluten!
Gluten-free Molasses Spice Cookies
Mix together dry ingredients with a whisk
- 1/2 cup sorghum flour
- 1/2 cup teff flour
- 1/2 cup tapioca starch
- 1/2 cup cornstarch
- 1 tsp. cinnamon
- 1 1/4 tsp. ground ginger
- 1 tsp. allspice
- 1/4 tsp. ground cloves
- 1/4 tsp. ground black pepper
- 1 tsp. xantham gum
- 1 tsp. baking soda
- 1/2 tsp. baking powder
- 1/4 tsp. salt
- 1/2 cup Earth Balance shortening
- 2/3 cup sugar
- 1/4 cup cooking molasses
- 1 egg
Cream together the Earth Balance and sugar. Add in the cooking molasses and the egg and mix thoroughly before adding the dry ingredients.
Drop by tablespoons and roll in sugar before placing on a parchment-lined cookie sheet. Bake at 350 for 12-13 minutes.
]]>I recently got a copy of David Lebovitz’s most recent book, Ready for Dessert, and have noodled around a little bit, but wanted to make a few of the cakes. For tonights dinner, I was looking for something that wouldn’t be too sweet, and might pair well with some of the rhubarb that was begging to [...]]]>
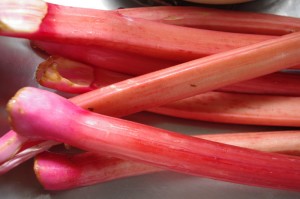
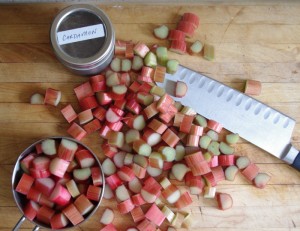
I recently got a copy of David Lebovitz’s most recent book, Ready for Dessert, and have noodled around a little bit, but wanted to make a few of the cakes. For tonights dinner, I was looking for something that wouldn’t be too sweet, and might pair well with some of the rhubarb that was begging to be used up. Pistachio Cardamom cake seemed to be just the thing!
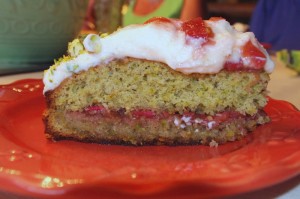
I made the pistachio cake as written and it is pretty easy to pull together. I baked in a regular cake pan (no cake pan strips) just to see how much it would dome — as you can see from some of the pics that follow, it does dome slightly, so if you like your cakes level, use a strip around the edge.
The other nice thing about this is that it uses plain old AP flour. David’s recipes are really nicely written — everything is in volume and weight measures (grams!) — this will make converting some of these recipes to gluten-free that much easier! David’s original recipe calls for a syrup/sliced almond topping, but I decided to split the cake into two layers and put rhubarb compote in between. I was struck by the contrast between the bright green of the pistachios and the vibrant pink of the rhubarb, and have to confess to a Hello Kitty moment!
The rhubarb compote is pretty easy — make a 2:1 syrup with 1 teaspoon cardamom, 1 teaspoon coriander, with 1 c sugar, 1/2 c water. When it comes to the boil, add about 3 c chopped rhubarb. simmer for 3-5 minutes. If you want it thicker, you can strain off the syrup and reduce in the microwave for 10 minutes on high in a pyrex measuring cup. Add about 2 T rosewater
Marscapone whipped cream — whip 250 ml heavy cream, 2T sugar, fold in 250 ml marscapone
]]>Tonight’s post is another easy dinner, that you can throw together with mostly on-hand pantry items (depending on your pantry), but can also be modified to meet whatever flavour profile you’re hankering for, or adapt to whatever seafood you have available.
These [...]]]>
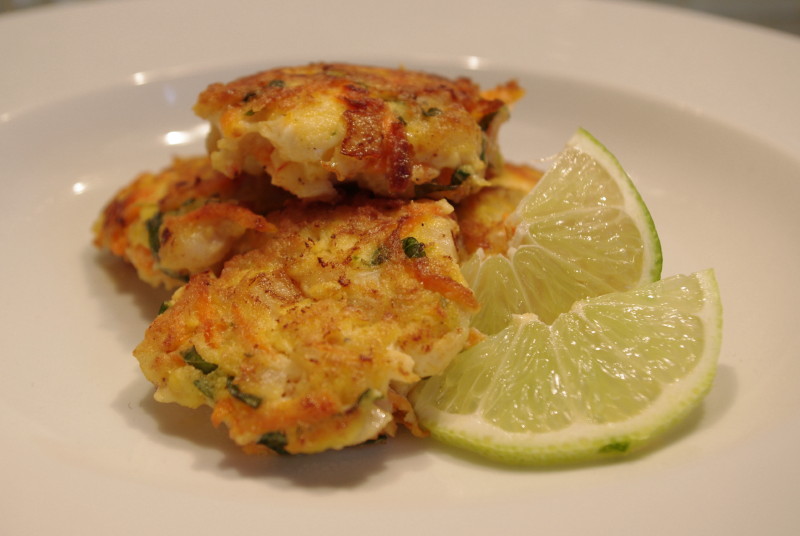
Tonight’s post is another easy dinner, that you can throw together with mostly on-hand pantry items (depending on your pantry), but can also be modified to meet whatever flavour profile you’re hankering for, or adapt to whatever seafood you have available.
These little fritters are also great for folks who are on carbohydrate-restricted diets, as they make use of nut flour rather than grains — making them gluten-free to boot!
For tonight’s dinner, we went with slightly fresher flavours of lime, ginger and basil, and rounded out the fritters with a few grated carrots for added colour and nutrition.
The choose-your own adventure part? You can substitute the prawns I used here for finely chopped seafood of pretty much any that is moderately firm — scallops, fish, shrimp, even lobster if you’re feeling extravagant! You can also substitute the almond flour for any other nut meal, or even a flour such as chickpea flour for a texture more like tortillitas. The veg are versatile to, subbing carrots for shredded zucchini, or even finely chopped, seeded tomatoes.
Finally, you have control over how you want to cook these — avoiding oil, you can bake them in the oven on parchment, 400 degrees, 10-12 minutes. I’ve panfried these, but you could also drop into simmering broth and have them like dumplings in soup!
We opted here for more asian flavours, but if you’re inclined, you could leave out the ginger, and basil, and add cumin, coriander and cilantro for more Mexican flavours. Hey, they’re your fritters! Its your Monday night dinner adventure!!!
Seafood Fritters
- 1 lb. prawns, shelled and finely chopped
- 1/2 small onion, finely diced
- 1 large clove garlic, minced
- 1 cup grated carrot
- 3/4 cup almond flour
- 1/2 teaspoon salt
- 1/2 teaspoon freshly ground pepper
- 1 1/2 teaspoon finely minced ginger
- zest of 1 lime
- juice of 1/2 lemon
- 6-8 basil leaves, chiffonade
- 2 eggs, lightly beaten
Combine all ingredients in a medium bowl and mix well to combine. Drop by 2 tablespoon scoops into a heated, oiled skillet, flattening slightly as you form the fritters. Cook 4-5 minutes per side, turning only once. Serve warm.
P.S. there were a number of requests for a cocktail post — stay tuned for a post tomorrow for an cocktail post on what to do with the other half of the lime from tonight’s dinner!
]]>We often have things like roast chicken, lasagna, rack of lamb, or a hearty stew, but with the weather perking up (its starting to feel sort-of like springtime!), I was feeling a little Mexican inspired, and decided to use pulled pork and let dinner do most of the cooking on its own.
Pulled pork is typically associated with Southern style BBQ, but it is actually quite a versatile meat, and if its cooked relatively plain, the succulent nature of the meat shines through, and you can sauce it as you go, for bahn-mi type sandwiches, traditional BBQ pulled pork sandwiches, kimchi soup with ramen noodles or more! AND, its one of the cheapest cuts of meat you can go with, as you use pork shoulder (butt roast) which needs a low and slow approach.
This takes some time, and a little foresight, but only has a couple of steps, and the oven does all the work! Try it sometime, sit back, relax and breath in the delicious smells through the afternoon.
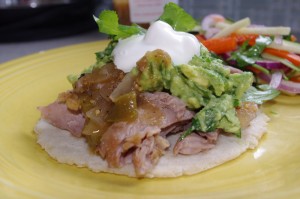
Tonight’s pork tacos saw the pulled pork lightly sauced with a reduction of the cooking liquid, placed on top of homemade tortillas, and topped with some tomatillo sauce I put up last fall, guacamole and a dollop of creme fraiche. With a 3 lb or so piece of pork-shoulder, you will have plenty for tacos, and lots left over to use through the week.
]]>General Purpose Pulled Pork
- 3-4 lb pork butt roast
- 1 T ground coriander
- 1 T ground cumin
- 1 T sea salt
- 1 T ground pepper
Combine the salt, pepper and spices, and rub over the pork roast. Let sit in the fridge for at least 3 hours (or overnight). Just before cooking, Preheat the oven to 300 degrees. Drain off any accumulated juices, place in a 5 quart dutch oven with a lid. Pour in about 1/2 cup – 1 cup of liquid. You can use beer, apple juice, or stock. This time around, I opted to use a bit of whisky in the basting liquid.
Toss the whole works in the oven, and check on it every 60-90 minutes, basting the pork roast as you go. Keep in the oven for about 4 hours until the fat is starting to melt, and the meat shreds easily with two forks. Let stand for at least 20 minutes before shredding. Skim most of the fat off the basting liquid, and use to moisten the pork if needed. Season lightly with salt and pepper as you toss in the liquid.
But before we get into the recipe, here’s a couple of things you need to know about me:
I loathe the [...]]]>But before we get into the recipe, here’s a couple of things you need to know about me:
- I loathe the ubiquitous Food Network eyeroll when tasting food!
- I do NOT moan uncontrollably when nomming on even the tastiest of treats!
- I am skeptical by nature — I like to keep abreast of what’s new, but I do need to be convinced to give up valuable pantry/cupboard/fridge space for said new thing!
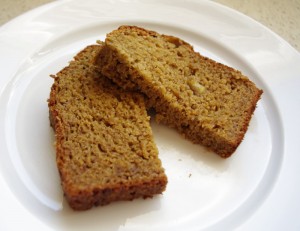
So that being said, this banana bread recipe is one that might make me do a double take, and the Timtana flour is a definite plus, although the recipe will work with other high protein flours in its place. Even my husband, who is a dye-in-the wool skeptic when it comes to gluten-free baking, happily snarfed down his share, before asking for more!
As I posted about a week ago, Timtana flour is a gluten-free flour made out of timothy grass by Montana processors. It is very high in protein, and helps create nice moist baked goods. It is particularly good in yeast-raised baked goods, but really shines here in the banana bread, adding structure and volume as well as a nice nutty undertone which complements the banana flavour.
This is a plain banana bread, showcasing the natural flavour of the fruit, but if you want, you can fold in 1 cup or so of nuts, raisins or even chocolate chips!
When I started working on this, I used a tried and true recipe I always fall back on from Cooks Illustrated (which is wheat-based). This is a plain ‘ole banana bread, which I think is just what the doctor ordered, after a couple of months of fancy feasting! Sometimes there’s nothing more satisfying than a slab of warm banana bread and a cup of coffee!
If you don’t have Timtana flour, you can substitute another high-protein flour such as teff, garfava or defatted soy.
Printer friendly recipe: Timtana banana bread
]]>Gluten-free Banana Bread with Timtana flour
Combine dry ingredients in a bowl and whisk well to mix.
- 3/4 cup Timtana flour (90 grams)
- 1 cup cornstarch (128 grams)
- 1/4 cup almond flour (30 grams)
- 1 teaspoon xantham gum
- 3/4 teaspoon baking soda
- 1/2 teaspoon salt
- 1/2 teaspoon freshly ground nutmeg
Mash bananas well and add other liquid ingredients in a large bowl
- 3 large ripe bananas, mashed well
- 1/4 cup buttermilk
- 2 large eggs, beaten
- 6 Tablespoons grape seed oil (or other neutral vegetable oil)
- 3/4 cup evaporated cane juice or granulated sugar
- 1 1/2 teaspoon vanilla
Preheat oven to 350 degrees.
Add dry ingredients to the liquid ingredients, and mix very well. Pour into a well greased loaf pan.
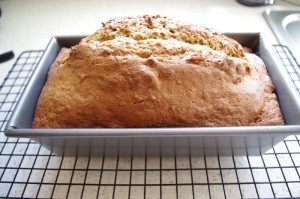
Bake at 350 degrees for 60 minutes. After 15 minutes, slash lightly down the centre to prevent cracking on the sides. Cool in the pan for 10 minutes then remove and let cool to room temperature before slicing.
