I recently got a copy of David Lebovitz’s most recent book, Ready for Dessert, and have noodled around a little bit, but wanted to make a few of the cakes. For tonights dinner, I was looking for something that wouldn’t be too sweet, and might pair well with some of the rhubarb that was begging to [...]]]>
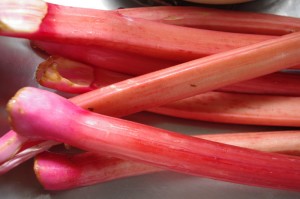
I recently got a copy of David Lebovitz’s most recent book, Ready for Dessert, and have noodled around a little bit, but wanted to make a few of the cakes. For tonights dinner, I was looking for something that wouldn’t be too sweet, and might pair well with some of the rhubarb that was begging to be used up. Pistachio Cardamom cake seemed to be just the thing!
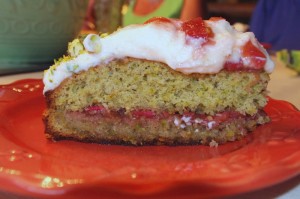
I made the pistachio cake as written and it is pretty easy to pull together. I baked in a regular cake pan (no cake pan strips) just to see how much it would dome — as you can see from some of the pics that follow, it does dome slightly, so if you like your cakes level, use a strip around the edge.
The other nice thing about this is that it uses plain old AP flour. David’s recipes are really nicely written — everything is in volume and weight measures (grams!) — this will make converting some of these recipes to gluten-free that much easier! David’s original recipe calls for a syrup/sliced almond topping, but I decided to split the cake into two layers and put rhubarb compote in between. I was struck by the contrast between the bright green of the pistachios and the vibrant pink of the rhubarb, and have to confess to a Hello Kitty moment!
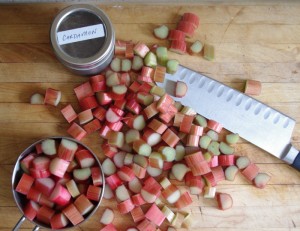
The rhubarb compote is pretty easy — make a 2:1 syrup with 1 teaspoon cardamom, 1 teaspoon coriander, with 1 c sugar, 1/2 c water. When it comes to the boil, add about 3 c chopped rhubarb. simmer for 3-5 minutes. If you want it thicker, you can strain off the syrup and reduce in the microwave for 10 minutes on high in a pyrex measuring cup. Add about 2 T rosewater
Marscapone whipped cream — whip 250 ml heavy cream, 2T sugar, fold in 250 ml marscapone
]]>I tried some out a couple of [...]]]>
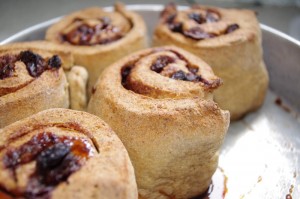
I tried some out a couple of days ago in the whole “grain”, gluten-free cinnamon buns that I make with sorghum. These are much heartier than your typical fluffy white cinnamon buns, but they still feel like you are eating something treat-like.
I decided to try the Timtana flour in these instead of garfava, and also decided to switch to light buckwheat flour for the usual sorghum flour. From the trials I have done, it appears that the optimal balance of starch:flour in order to have a somewhat open texture while boosting the nutritional value is equal parts of starch: flour.
These cinnamon buns are gluten-free, but also dairy-free and egg-free. These are NOT a super fluffy cinnamon bun, but they do have an open texture, and are quite moist. The addition of the Timtana flour appears to help create a nice moist dough that keeps fairly well over a day or two. These remained as moist a day later, and didn’t develop the typical crumbliness of many gluten-free doughs.
Timtana and Buckwheat Cinnamon Buns
- 1 1/4 cups light buckwheat flour (150 grams)
- 1 cup Timtana flour (120 grams)
- 2/3 cup tapioca starch (80 grams)
- 1/2 cup cornstarch (64 grams)
- 1/4 cup almond meal
- 1 Tablespoon xantham gum
- 4 teaspoons granulated yeast
- 1 teaspoon salt
Combine dry ingredients in a medium bowl and mix well with a whisk
- 1 Tablespoon Ener-g egg replacer
- 4 Tablespoons cold water (60 ml)
- 2 Tablespoons coconut oil, melted and cooled
- 1/2 cup brown sugar
- 1 teaspoon cider vinegar
- 1 cup vanilla soymilk at room temperature
Combine egg replacer with water and whisk or mix with a hand-mixer until very frothy, like egg whites. Add the remaining wet ingredients and then fold in the dry ingredients. Mix with the hand mixer for at least 1 minute, until the dough is smooth.
Place the dough on a cornstarch dusted silpat mat, and place a piece of plastic film overtop. Roll out to a rectangle approx. 18 inches by 12 inches.
- 1/3 cup Earth Balance buttery flavoured shortening or other vegan shortening
- 1/3 cup packed light brown sugar
- 1 Tablespoon cinnamon
- 1 cup raisins
Preheat oven to 350 degrees. Spread the softened butter over the dough, leaving a 2″ border on one side. Spread the sugar, cinnamon and raisins over the dough. Roll up like a jelly-roll from the long-side. Cut into 6-8 slices and place in a greased 9″ cake pan. Cover loosely and let rise for 60 minutes, or until doubled in size. Bake for 50-60 minutes, tenting with foil if they appear to be browning on top too quickly. Glaze them if you like yours glazed.
Oops, almost forgot to link up to Yeastspotting — a weekly roundup of all things yeasty!
]]>A quick whirl around the interwebz will reveal lots of brownie recipes, but nary [...]]]>
A quick whirl around the interwebz will reveal lots of brownie recipes, but nary a gluten-free vegan recipe! things just get too complicated where chocolate or cocoa solids are involved to be mucking around without eggs!!!
There was a bit of an exchange about using extra baking powder, and other options, and I went away thinking (so did Karina as it turned out!). A couple of days later, here’s my solution to the gluten-free vegan brownie success! As I was thinking, I convinced myself that some extra structure with oomph was in order to prevent brownie fail. Most of my previous efforts were soggy in the middle, or cooked in the centre, but totally overcooked on the edges. I had successfully made chocolate cake, but the trick with the brownies is to have something slightly denser, without being gummy. I was aiming to add extra structure through the protein in teff flour, and the setting properties of potato starch and agar powder at around 180 to 190 degrees.
Karina’s solution was pretty ingenious, but also tackled the structure issue head-on with the use of quinoa flakes and extra protein in quinoa flour. You can see her recipe here.
For my brownies there were a few criteria:
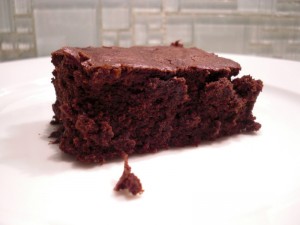
- the brownies had to have that characteristic shiny cracking top
- The brownies had to bake in a “standard” pan — no cheating by baking them in small muffin pans, or the infamous “Edge” pan. i was aiming for a recipe people could make with standard kitchen wares.
- i like my brownies on the cakier side, so they had to be rich and chocolatey, but not gummy.
- there had to be enough structural integreity in these puppies that they would carry some chocolate chips if I felt like folding them in for xtra chocolate shock-value
- they had to be completely vegan and soy-free, for those avoiding eggs and dairy, and unable to eat soy. This ruled out options like tofu and Earth Balance shortening.
These are pretty tasty little morsels. There is enough leeway in the recipe that if you want them a little bit richer, you can increase the coconut oil by 2 tablespoons while reducing the water mixed with the Ener-g by the same amount. The recipe will also accommodate up to 1 cup of vegan chocolate chips folded in at the end, or nuts if you’re into that kind of thing.
finally, a quick word about chocolate: many chocolates, while gluten-free, contain milk solids and therefore aren’t vegan. I use a couple of chocolates regularly that contain none, including Scharffenberger (both the 62% and 70%) and Ghiradelli semi-sweet. If you aren’t worried about the milk solids, Nestle is now labelling its chocolate as gluten-free.
Glutenfree, Vegan Brownies
Makes one 8-inch square pan of brownies, which will make 16 individual brownies.
Combine dry ingredients in a bowl and mix with whisk until well combined
- 70 grams teff flour
- 70 grams potato starch
- 1 teaspoon xantham gum
- 1 teaspoon agar powder
- 1/4 teaspoon salt
- 1 1/2 teaspoon baking powder
Melt together and set aside:
- 6 ounces semisweet chocolate
- 4 tablespoons coconut oil
Mix together and set aside:
- 4 tablespoons Dutch processed cocoa powder
- 1 teaspoon instant coffee powder
- 2 Tablespoons hot water
- 1 1/2 Tablespoons vanilla extract
Whisk vigorously or with a hand mixer:
- 2 tablespoons Ener-g egg replacer
- 8 Tablespoons cold water
- 1 cup light brown sugar
Preheat the oven to 350 degrees. Grease an 8-inch square baking pan with coconut oil and dust with cocoa powder.
Add the chocolate and the cocoa powder mixtures to the egg replacer/sugar and mix well. Then add the dry ingredients, mixing until everything is well incorporated. If you are adding nuts or chocolate chips, fold them in now. then add the dry.
Pour into an 8-inch square greased pan, bake at 350 for 30 minutes.
Adapted from a Cooks Illustrated brownie recipe
]]>There we have it. I responded that my take these days wld probably involve Calvados and Angostura, which I’m enjoying in many permutations and combinations lately, AND some cinnamon syrup. After this exchange, I was invited to “share [...]]]>
 There we have it. I responded that my take these days wld probably involve Calvados and Angostura, which I’m enjoying in many permutations and combinations lately, AND some cinnamon syrup. After this exchange, I was invited to “share with the class”, and so here you see me blogging about a reinvented cocktail on a blustery Friday night! I’ve named this the Roddy Alexander, after the instigator, Rod Phillips (over at Liquor Plus).
For the more adventurous, I prefer a flip to a cream-based drink, so I would also be inclined to take the same ingredients sans cream, and shake very well with a whole egg, and strain into a glass. Try it and see which one you prefer!
I prefer my drinks a little less sweet than a traditional Brandy Alexander, so while this is a sweet drink (best for dessert), it does have a bit of depth to it. A bonus! I’ve found another drink that pairs quite nicely with a buttertart!
The “Roddy” Alexander
Combine all ingredients in a shaker with ice, and shake. Double strain into a chilled cocktail glass, and garnish with freshly grated nutmeg.
*cinnamon syrup: 2 cups sugar, 1 cup water, 2 medium sticks cinnamon, broken into pieces. Boil gently for at least 2 minutes, let sit for at least 10 minutes longer. Strain out the cinnamon sticks. This keeps well at room temperature, although the cinnamon flavour will diminish after 1 week.
]]>
I may have blogged before about the SaltSpring [...]]]>
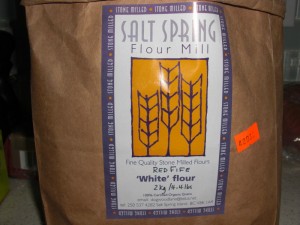
I may have blogged before about the SaltSpring Mills flour, but here I go again — they have a small mill on SaltSpring Island, and mill up red-fife flour, and a “white” red-fife flour which I have found works great for pastry and as a substitute for while flour. Its actually a soft wheat, light in colour, and low in gluten, so it has great mild, whole-grain flavour, but doesn’t get overly tough. Since finding this, I use unbleached white flour a lot less than I used to, and I find this, and the red-fife bread flour are the freshest I have found short of milling my own flour!
For any of you reading from the US, buttertarts are a uniquely Canadian invention (who says ingenuity can’t come from a long, cold, dark, winter!!!). There are a few “musts” in my books for the perfect buttertart:
- Lots of flaky, unsweetened pastry to counter the super sweet filling:
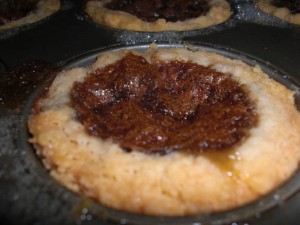
- Pastry HAS to be homemade (sorry to those of you who use pre-made tart shells). There is a certain shape to a buttertart, that only comes from making your own tart shells in a muffin tin: Cylindrical, solid and dependable looking! And the pastry is much flakier when you make your own.
- Real butter in the filling.
- Raisins (yes, I know folks have come to blows over the raisins vs. currants debate, but I’m a raisin kind of guy!) and NOT nuts!!!
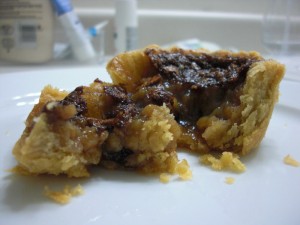
- A filling that is gooey and only very slightly runny (again, many mild-mannered Canadian folks have come to blows over this, but I like ‘em a little on the gooier side)
- A little crust formed on the top of the filling from the crystallization of the sugars in the filling
- Not too big — these puppies are sweet, after all!
Finally, the other other ritual buttertart moment is the removing of the buttertarts from the pan — will they stick?!? will they come out in one piece? Its hard to wait (which you have to do!) until they are cooled off enough, and even then, if you’ve made the pastry right, it will *just* hold together enough to encapsulate the filling. You have to do this gently, coaxing these little morsels out of the tin. Be patient, and all will be well!
All of this makes for a buttertart that you can eat in 3-4 bites, but for which you have to adopt the “buttertart stance” — legs apart, head slightly forward, elbow up, aaand, enjoy!
This recipe was courtesy of Anna Olsen’s show Sugar, and is one I’ve used quite a bit over the past couple of years. I like the flavour of the added maple syrup, and find it also keeps the texture of the filling nice and soft and gooey. The original recipe also had caramel sauce on top, but I think that’s a little like gilding the lily!
Maple Buttertarts:
Crust
- 2 1/4 cups pastry flour (I used Salt Spring Mills “white” red-fife flour)
- 1/2 tsp salt
- 3/4 cup lard or vegetable shortening
- 1 tsp lemon juice
- 1 egg
- 3 to 4 tbsp cold water (as needed)
Filling
- 1 cup dried currants (I used raisins)
- 1/2 cup hot water
- 1/4 cup unsalted butter, room temperature
- 1/2 cup dark brown sugar, packed
- 2 eggs
- 1 tsp vanilla extract
- 1/2 tsp white vinegar
- dash cinnamon (I subbed out ground coriander, just because I like it better!)
- 1/4 cup corn syrup
- 1/2 cup maple syrup
Bake at 375 degrees for 20 minutes.
