As you know, I have had the wild-yeast starter going for a while now and been baking fairly regularly with it. Expect some posts to come on the different things you can do with it besides just bread.
In the meantime, in my quest for [...]]]>
As you know, I have had the wild-yeast starter going for a while now and been baking fairly regularly with it. Expect some posts to come on the different things you can do with it besides just bread.
In the meantime, in my quest for the perfect gluten-free bagel, I’ve been playing around with hydration levels and long rise times in an effort to get a texture closer to the perfect chew of a Montreal style bagel. I think we’re nearly there!
While this is in baguette form, it had a long, slow rise overnight in the fridge, has a hydration level closer to 67 percent, rather than the usual 100 percent i work with as a starting point for gluten-free breads, and its a lot easier to form into ropy lengths, perfect for turning into bagels! Hub also liked the flavour (no mean feat that!) pronouncing it pleasantly sourdough-ey
I leave you with … the soon to be bagel
]]>I was also [...]]]>
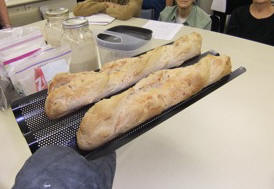
I was also invited to attend the most recent Victoria Chapter meeting of the Canadian Celiac Association to do a bread baking demo, where we walked through using the wild yeast starter for sourdough baguettes. When you combine the use of the wild yeast starter, with basic ratios, and opt to weigh your ingredients, the baking is actually much more intuitive than conventional gluten-free bread baking, and is quite a bit more forgiving in terms of temperature variations, rise times etc. Here`s 2 baguettes fresh from the oven, where we were`t quite sure how well calibrated the oven was, and had to cut the rise time short!
As I noted in the last post, Dr. Jean Layton has also been working on her sourdough recipe, and just posted hers today on her recipes blog. It`s always interesting to see what different approaches different gluten-free bakers opt to take — she has achieved a fabulous result with a lower hydration level (somewhere closer to the typical 67% hydration level you would get with a 1-2-3 sourdough formula).
When I was playing around with the sourdough starter, I opted for a higher hydration level, which allows you a shorter rise time (good if you`re in a hurry) because the dough is considerably softer, but I also started with a smaller amount of starter.
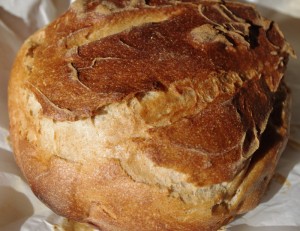
So here you go: This recipe makes both baguettes and boules. If you opt to make 1 large boule, you can cut the liquid down by about 1/4 cup. Mound the dough onto a piece of parchment, smooth into a round boule shape and let rise until nearly double in size. While the boule is rising, preheat the oven AND a lidded cast-iron dutch oven to 450 degrees. Slash the dough before baking, plop the dough on the parchment into the hot pan, cover with the lid and bake in the oven at 450 degrees for 25 minutes. Remove the lid, reduce the oven to 400 degrees and cook for another 30-35 minutes, until the internal temperature reaches 205 degrees.
Gluten-free Wild Yeast baguettes (Printer friendly recipe)
1-2 hours before you plan to bake, remove the “mother” starter from the fridge, mix together your “starter” for the recipe …
- 1/2 cup sourdough starter
- 1/2 cup water
- 1 Tablespoon potato flour (NOT starch)
Let sit, covered for 1 –2 hours to get the wild yeast going again.
In a medium bowl, combine dry ingredients and whisk well
- All of the starter you made earlier
- 1 Tablespoon honey
- 1 Tablespoon neutral flavoured oil
- 1 1/2— 1 3/4 cup water
Add the dry ingredients to the mixer, and mix at medium speed for at least 3 minutes until the dough becomes smooth
- 200 grams Jean’s sourdough flour*
- 50 grams cornstarch
- 50 grams tapioca starch
- 2 1/4 teaspoons xantham gum (or guar gum)
The dough will be very soft and billowy, and should be wet enough to allow it to rise easily. If it looks like it needs more water, add 1-2 T at a time.
Use a scoop to place the dough in a greased baguette pan. Smooth out the baguettes and slash. Let sit, covered for at least 1 hour, and up to 4 hours. You can also raise the baguettes overnight in the fridge for further development of the flavours.
20 minutes before baking, preheat oven to 425 degrees.
Bake for 30-35 minutes
* Sourdough flour blend (makes 1 large batch of flour, weight, 145 grams per cup)
- 583 grams brown rice flour
- 583 grams sorghum flour
- 583 grams millet flour
- 290 sweet rice flour
- 74 grams garfava flour
- 155 grams white bean flour (I switched the proportions of the garfava/white bean flours)
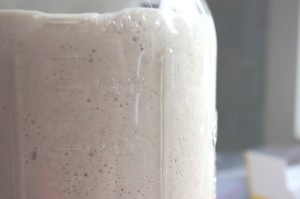
To make a starter: Mix at 100% hydration (equal parts water and flour), let sit 2 days at room temp until it starts to bubble.
After 2 days, you can start to feed the starter — approximately 1/4 the volume of the total starter. (e.g. if the starter is 2 cups, feed it with 1/4 cup flour + 1/4 cup water. Every 3rd feed or so, adding 1T potato flour will help promote active yeast growth in the starter.
If you keep the starter in the fridge, feed it approximately 1 x per week, or every time you take it out to bake. The starter can be used for breads, but can also be used to leaven other things from muffins to pancakes — just bear in mind that your final product will have the “tang” of the wild yeast starter.
As always, if it has yeast in it, we send it over to Yeastspotting, that bloggy repository of all things yeasty and baked! If you haven`t checked it out, its very inspiring to check out the amazing baking!
]]>So I’m starting by sharing some of the non-sourdough experimenting I’ve been doing with this flour blend that Dr. Jean Layton has come up with for her sourdough feeder. As she mentions in her post, [...]]]>
So I’m starting by sharing some of the non-sourdough experimenting I’ve been doing with this flour blend that Dr. Jean Layton has come up with for her sourdough feeder. As she mentions in her post, she was aiming for something that was close in composition to hard white winter wheat — a wonder grain when it comes to bread baking with long ferments.
So I’m sharing a few things as we go…I’ve been playing around with this flour blend, both with regular baking and as a sourdough, to see what kind of properties it had, and whether it was versatile enough for some other applications like bagels, which also normally rely on the unique properties of high-protein bread flours.
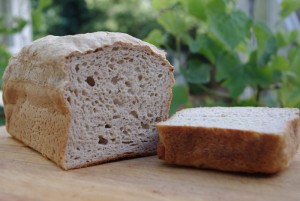
This first loaf is not, in fact, a sourdough, but just a regular loaf which I had hoped to make both dairy-free and egg-free. I was also aiming for structure that was pleasant and springy, and would have good shelf-life, and retain lots of bounce and moisture, so that it could be eaten without toasting. As many of you know, gluten-free breads, by the nature of the ingredients, tend to lose that elasticity quite quickly, and in applications such as bread puddings, absorb moisture from the inside-out.
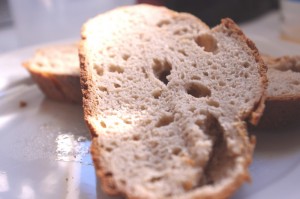
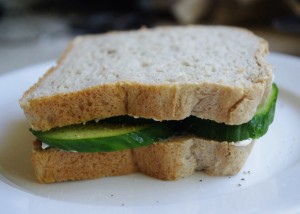
I’ve been pleasantly surprised by this loaf — Its been sitting on the counter now for two days, and each day, I’ve been able to slice it and make a sandwich with it, without having to toast the bread first!!! The loaf is crusty on the outside the day of baking, but after being in a ziploc bag, the crust becomes tender and springy also. The combination of the flour, plus the addition of the chia seeds really seems to be working some gluten-free magic here!
Bread #1 with Dr. Jean Layton’s flour blend
- 200 grams Dr. Jean Layton’s sourdough flour blend
- 50 grams tapioca starch
- 50 grams cornstarch
- 1 1/4 teaspoon xantham gum
- 1 teaspoon guar gum
- 3/4 teaspoon sea salt
- 2 1/2 teaspoons yeast
Mix all dry ingredients together in a medium bowl, whisking to combine very well
- 2 Tablespoons chia seed, ground in a coffee grinder
- 1/2 cup lukewarm water
Mix the chia seed with the water in the bowl of a stand mixer (mix well). Let sit for 15 minutes until it forms a gel. Add:
- 1 Tablespoon honey
- 1 1/4 cup lukewarm water
Mix wet ingredients well, Add the dry ingredients and mix with the paddle attachment on medium speed for at least 3 minutes. Grease an 8 1/2 X 4 1/2 loaf pan, and transfer the bread dough (it will look like thick cake batter), to the loaf pan. Smooth out the top, and cover with a damp towel or plastic wrap. Let the dough rise for 30 minutes.
While the dough is rising, preheat the oven to 400 degrees F (use an oven thermometer to make sure your oven is calibrated!).
After rising, bake the loaf at 400 degrees for 35-45 minutes, until the interior registers 205 degrees F.
Stay tuned for more baking with this flour! I see chewy bagels in our future, as well as lots of sourdough bread!!!
As always, this is made with yeast, so we’re sending a link over to Yeastspotting! Go check out all the amazing bread bakers out in the blogosphere!
]]>I’ve been playing around with the gluten-free recipes from Healthy Bread in 5 Minutes per day. Zoe Francois and Jeff Hertzberg have done a great job of providing whole grain and gluten-free options for their Artisan Bread in 5 minutes per day method.
Simply put, this method is great for families and households where you would like [...]]]>
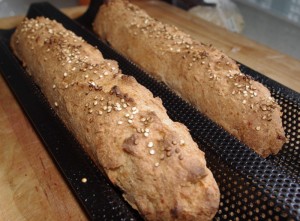
I’ve been playing around with the gluten-free recipes from Healthy Bread in 5 Minutes per day. Zoe Francois and Jeff Hertzberg have done a great job of providing whole grain and gluten-free options for their Artisan Bread in 5 minutes per day method.
Simply put, this method is great for families and households where you would like to be able to make bread with a minimum of fuss. It involves mixing larger batches of dough, and letting a long, cool, delayed fermentation do the rest of the work for you. For wheat-based breads, this method is great, as it develops the gluten structure slowly, but thoroughly, and has the added benefit of the enzymatic reactions typical of a delayed ferment. Obviously, with gluten-free breads, there is no need to develop the gluten, but this method is a great one nonetheless, for the convenience AND for the flavour development
While I’ve been doing my own noodling around with these recipes to make them egg and dairy-free, a while back, I noticed that ABin5 put up their own version of an egg-free, gluten-free version, which was also whole-grain heavy to boot! AWESOME, I thought, and read on, only to discover that it made use of some of the new King Arthur gluten-free flours — not at all readily available to us up here in B.C. In my trials with this method, I’ve moved completely away from commercial egg-replacers as I found them too drying, and been relying on chia seeds or flax seeds, so I was interested to see that ABin5 also fell back on flax seeds for theirs.
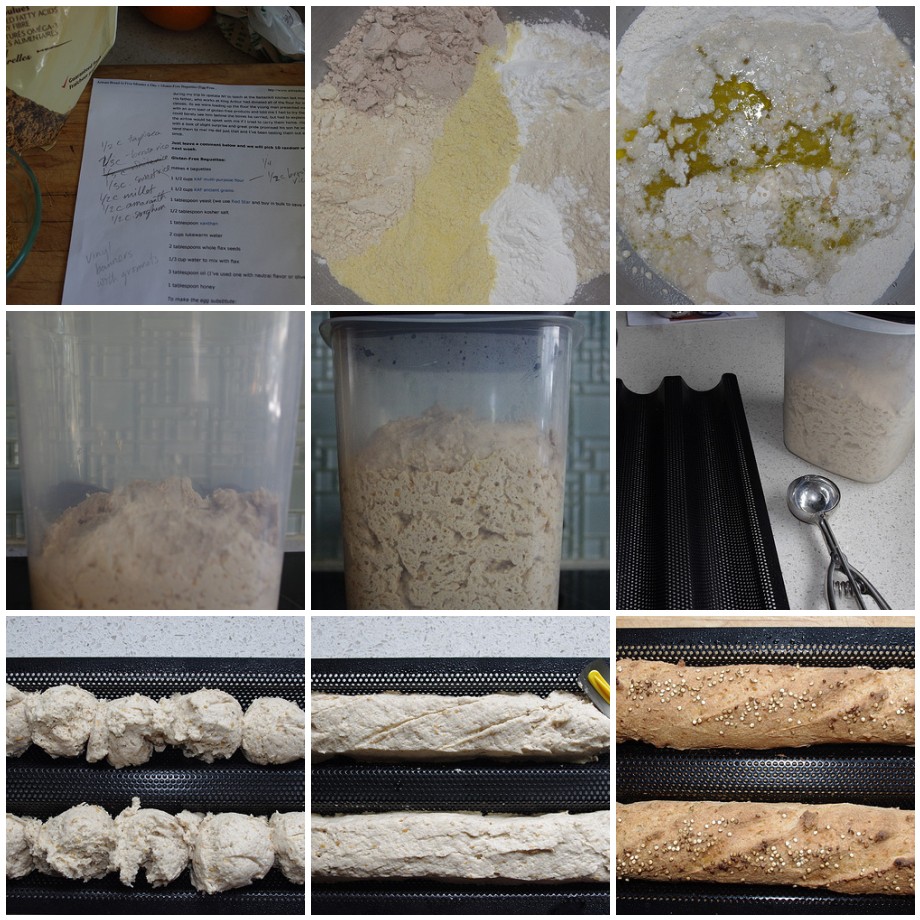
Undaunted, I set about to play around and come up with a recipe that would be heavier on whole grains, but be feasible for those of us still buying our flours separately! This is my modification of Zoe and Jeffs — the proportions are based on their original recipe, with the major change being the flours. This relies on only about 25% starch for the texture: considerably less than the minimum of 50% that many other gluten-free breads require to achieve a pleasant texture. The other addition here that is critical, is the inclusion of sweet rice flour, which adds moisture and helps with the binding of the final flour.
A final note: I’ve given proportions in volume measures here. There is minimal mixing required for this approach, as the xantham gum hydrates slowly while the dough sits, and I’ve found that hydration levels are easy to adjust for as you go. I’ve tried both volume and weight measures, and had consistent results with both, so left the measures as volumes as many folks find them easier.
We’re making baguettes here today, but stay tuned to see what else we can make with this dough! We’re also sending this one over to Yeastspotting, go check out what some amazing bread bakers have been up to!!!
Whole “Grain” Gluten-free, Egg-free Baguettes
(modified from Artisan Bread in 5 minutes per day)
- 2 tablespoons flax meal (I use golden flax seeds for their flavour)
- 1/3 cup warm water
- 1/2 cup tapioca starch
- 2/3 cup brown rice flour (make sure to use one that is very finely ground, not gritty)
- 1/3 cup sweet rice flour (also called “glutinous rice” or “sticky rice”)
- 1/2 cup millet flour
- 1/2 cup amaranth flour
- 1/2 cup sorghum flour
- 1 Tablespoon instant yeast
- 1 1/2 teaspoons sea salt
- 1 Tablespoon Xantham gum
- 2 cups warm water
- 3 Tablespoons olive oil
- 1 Tablespoon honey or organic cane sugar
Mix together the flax meal and 1/3 cup water and set aside for 15 minutes until it becomes thick and gloppy.
In a large bowl, mix together flours, yeast, salt, and xantham gum. Whisk well to combine all the ingredients (You do NOT want to have blobs of xantham gum!!!)
Add all the liquid ingredients to the dry ingredients and mix with a spatula until the dough is well mixed. Transfer the dough to a container with a loose fitting lid, and let rise for 1 1/2 – 2 hours until doubled in volume. The dough will be airier in texture than wheat-based dough. Store the dough in the refrigerator for up to 1 week.
To bake baguettes, preheat the oven to 450 degrees. Grease a baguette pan, or line with parchment paper. (You can do this on a heavy sheet pan, but the baguette pan allows for greater air circulation on all sides of the baguette — its all about the crusty exterior!!!)
To shape this dough, you want to handle it as little as possible. I’ve found the easiest way to form into baguettes is with a scoop, laying scoops of dough all in a row and then use a wet spatula or fingers to smooth out the scoops into a uniform baguette. Sprinkle seeds or gluten-free grains of your choice on top of the baguettes. Once you’ve formed the baguette, let it sit for about 30 minutes, to take the chill off the dough. It won’t double in size, but will have oven spring once it starts baking. You can also slash the top of the dough to control the rise, just be gentle when you do!
Bake at 450 degrees for 30-35 minutes. Let the baguettes cool completely before you try to cut them!
]]>One of the other things on the list was to incorporate chia seeds into more of the baking [...]]]>
One of the other things on the list was to incorporate chia seeds into more of the baking as a replacement for eggs.
So having some time this afternoon, off I went with the mixer and baking pans!
I started with a recipe from Betty Hagman (this woman was a gluten-free baking genius!!!) and made a few changes along the way to make it vegan, so this loaf is gluten-free, dairy-free and egg-free!
Oh, one of the other things I’ve been wrestling with is the apparent difference in strength of xantham gums — some are ground more finely than others, and I recently made a change in brands and had some puzzling results which I thought were the fault of yeast (or my fault due to overproofing!) Turned out it was neither, but the fact that the more dust-like xantham gum isn’t as strong as the stuff that has a slightly more granular texture! Of course, I found reference to this in one of the last books Betty Hagman wrote! Oh well, live and learn!!
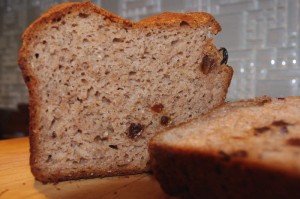
So here’s the loaf — I modified the recipe to use both xantham gum and guar gum (which results in both working together very nicely). The addition of the chia seeds creates a nice moist loaf with some good shelf-life to it, and the teff creates a nice mildly nutty flavour. The loaf is only very lightly sweet — 1/4 cup of raisins in this one, as I wanted to see how well the dough carried the raisins, it could probably be upped to about 6 Tablespoons for extra raisiny goodness!
Gluten-free Cinnamon Raisin Bread (adapted from a Betty Hagman recipe)
- 80 grams teff flour
- 30 grams sorghum flour
- 154 grams Bette’s Featherlight Mix (equal parts cornstarch, brown rice flour, tapioca starch, plus 1 teaspoon potato flour for every 1 cup other flours)
- 2 tablespoons almond flour
- 3/4 teaspoon xantham gum
- 3/4 teaspoon guar gum
- 1/2 teaspoon salt
- 1 1/2 teaspoons cinnamon
- 1 teaspoon gelatin or agar powder
- 2 Tablespoons evaporated cane juice
- 2 1/2 teaspoons instant yeast
- 2 Tablespoons chia seed soaked in 6T warm water
- 3 tablespoons grapeseed oil
- 2 tablespoons light agave syrup
- 1/2 teaspoon cider vinegar
- 1 cup plus 2 Tablespoons warm wter
- 1/4 cup – 6 Tablespoons raisins
Bake at 400 degrees for 55-65 minutes, until internal temperature registers 205 degrees.
This yeasty recipe is being sent over to Yeastspotting – if you haven’t been there already, go check it out! And if you have already, go on back and see what’ new this week!
]]>