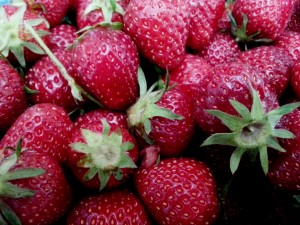
And sometimes, when the fruit is sooo perfect, it needs very little fussing about in order to capture all its glorious flavour and aroma! Old school European preserves fit the bill perfectly here
Our pantry is woefully lacking in jams at the moment, as Jeffrey pointed out a couple of weeks ago with a frown when rummaging about for something to put on his toast. So I guess this summer will involve more “putting up” fruit than I had originally intended.
If you plan to make preserves and jams and process the jars for storage on your pantry shelf, it does take a bit of planning to get things set up, but once its done there is NOTHING like opening a jar of something in the dead of winter that tastes like summer (remember that scene in Soylent Green, where he gets to take the spoon from the strawberry jam home?!)
This recipe-less recipe is for classic French-style strawberry preserves – which means the fruit is whole, suspended in a thick syrup. It’s a soft preserve rather than the heavily pectin-ed stuff you’ll find at the supermarket, and meant to be spooned onto scones, toast (or directly into one’s mouth ;)). We do make jams using mashed fruits and pectin (I prefer the texture of Pomona’s Pectin for those), but classic French style preserves are something extra special indeed!
This general method works with all manner of soft fruits – smaller fruits such as strawberries and cherries are left whole, larger fruits such as apricots or peaches can be cut into chunks. Because this method is done by weight, you can also take advantage of small harvests, to make impromptu batches of jams (and that means you can experiment with adding extra pops of flavour if you’re so inclined – a little lavender with your strawberries? a little coriander and allspice with your cherries? go for it!).
Before we get into it, a couple of points to remember:
- You may be tempted to skimp on the sugar – DON’T. For this type of preserve, the sugar is critical to getting your preserves to set, but more importantly, it helps prevent spoilage if you plan to keep them to use through the winter.
- Macerating the fruit in the sugar overnight may seem like a tedious, time consuming step, but it is an important step – don’t skip it! It serves 2 functions in this kind of jam – it helps extract the juices from the fruit, so they can be cooked to the “set” point separately (this helps with the texture of the syrup the fruit is suspended in), and second it impregnates the fruit with sugar, which helps each fruit retain its shape and texture even when cooked – without this step, the fruit will break apart as it cooks.
METHOD for preserves:
(for most fruits, a 1 quart basket will yield approx. 1 litre, or 4 250 ml jars of preserves)
- Pick over your berries to make sure you have smaller, bruise-free berries.
- Clean and hull them and weigh them out in a non-reactive (glass or stainless steel) bowl. Add in 75% of their weight in granulated sugar – e.g. if you have 1 kg cleaned berries, you will be using 750 grams sugar. Toss the berries gently with the sugar, cover the bowl and let the berries macerate overnight. You want the sugar to dissolve in the liquid the strawberries will exude.
- The next day, the juice of 1 lemon for every quart basket of berries you have used. Drain the syrup from the berries and place it over medium heat in a heavy bottomed saucepan or Dutch oven (use some thing that is wider than it is tall, but is tall enough to accommodate the jam as it boils up.
- Let the syrup cook until it hits the jam set-point (220F). At this point, add the berries into the pot. The temperature will drop – continue to cook the preserves until they reach 220 F again. If you don’t have a thermometer, you can use a cold saucer. a spoonful placed in the freezer for 1 minute will begin to firm up when it is ready.
- Remove from the heat and continue to stir gently, and skim the foam off as it cools.
- If you are processing your jars for longer term storage, now is the time to place in your (sterilized) jars with 2 piece lids, and process in a boiling water canning bath
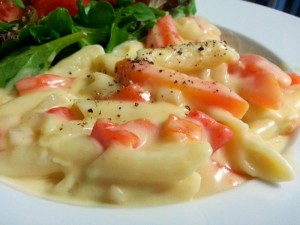 Bechamel sauce (or Sauce Béchamel if you are French) is one of those workhorses in the kitchen we tend to take for granted, until life throws a monkey-wrench into the works … like having to transition to a gluten-free diet!
Its a classic in the French culinary world, having first been codified by Auguste Escoffier in 1903 in Le Guide Culinaire, and deemed one the 5 mother sauces that form the basis of Haute Cuisine.
Bechamel at its core is simply a dairy-based sauce, thickened with a flour that has been cooked so the starch molecules absorb liquid and swell. Bechamel can have herbs or spices added – the classic Escoffier recipe calls for an onion studded with clove, but bay and nutmeg are also classic flavourings. The food geek in me would like to point out it is the starch that gives Bechamel its texture, NOT the gluten, therefore replicating the results is an easier task than you might have assumed.
- Add cheese and you have a Mornay sauce which makes a great way to get kids to eat broccoli, but also forms the base of homemade mac & cheese.
- Add some mustard and herbs and fold in a goodly amount of vegetables and top with breadcrumbs … voila you have a gratin!
- Stir in some egg yolks to the cooked Bechamel with whatever you please, and fold in the whipped egg whites and bake, and you have a souffle
- Use it to bind leftover mashed potatoes and fish or chopped chicken, or ham and roll in some breadcrumbs and you have croquettes
- Add a splash of wine before you add the milk, and Fold in some chicken and vegetables, and you have a quick pot-pie filling.
- Start with sausage meat and use the drippings as your fat, and fold in the sausage meat at the end and you have biscuits and gravy!
Anyway, you get the idea, the sauce is as versatile as your imagination! But traditionally it is made with wheat flour: equal weights of flour and butter, with milk stirred in, with the flour weighing about 10% of the milk. (For those of you who have made bread using the Tangzhong method … notice anything familiar there?!)
The good news is that this is one of those cases where method and technique can be applied quite well with gluten-free flours! Some flours are better suited to bechamel than others, mainly because of mouthfeel once the starches have cooked, but I’ve successfully made bechamel out of most of the flours from the grain family, and also used legume flours in a pinch. I do find also that gluten-free flours aren’t quite as sticky as wheat flour, so take a little more than with wheat flour to get the desired consistency.
My Ratio for Gluten-free Bechamel
- 1 T + 1 tsp gluten-free flour
- 1 T butter or fat
- 1 cup of milk
Top 5 flours I like to use to make Gluten-free Bechamel:
1. Sweet rice flour
2. Raw buckwheat flour (you can make this by blitzing raw buckwheat groats in a coffee grinder)
3. Masa harina
4. Sorghum flour
5. Millet flour flour
But this doesn’t mean you can’t use for example, brown rice flour – just make sure to cook the sauce a few minutes longer if you are using any of the whole grain flours, otherwise they will be gummy and unappetizing b/c the starches take longer to hydrate.
Some people like to use starches such as cornstarch or tapioca starch – these will also work, but give too slick a texture IMO (more like fruit pie filling than sauce)
Method:
Turn your burner to medium heat, and melt the butter or oil in a small saucepan. Add the flour, and stir to ensure the flour is fully coated with the oil.
Continue to stir until the roux begins to dry out a bit and just starts to become golden, about 3-5 minutes.
Add 1/4 of the milk, stirring well to loosen the roux. The mixture will begin to thicken into a paste as it heats up. Stir in the remaining milk and mix well with a whisk, stirring to avoid clumps forming.
Continue to whisk as the mixture thickens. It will be ready when your whisk leaves “tracks” in the sauce. If you are adding cheese, turn the heat to low, and add grated cheese gradually until it is melted.
A note on freezing
Bechamel forms the basis of many dishes that are great to prepare in larger batches and freeze! There are a few of the gluten-free flours, however, that do not freeze well, losing their viscosity and binding properties after freezing and thawing – the cell walls actually rupture, causing your sauces to break and weep (not an attractive quality).
The 2 main culprits are rice flours and potato starch/flour – Generally if I’m making something bound for the freezer, I avoid rice as a thickener (also note that rice-based pastas will disintegrate on freezing and thawing) and stick with the corn, sorghum or buckwheat
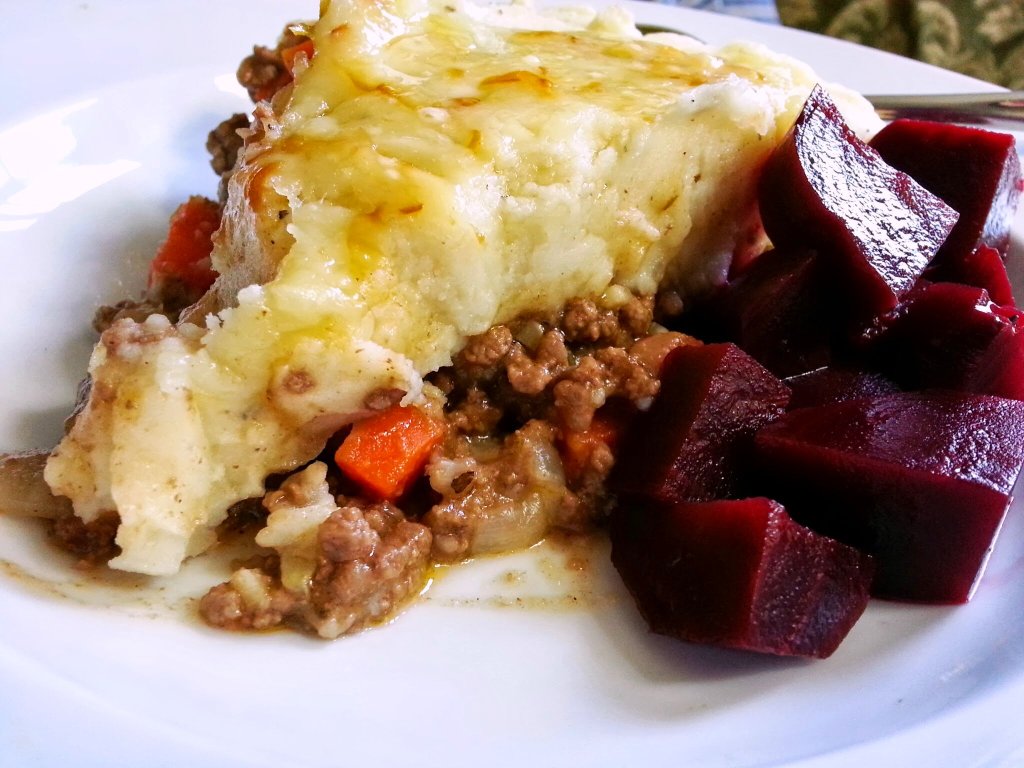
]]>This makes up a lot of shepherd’s pie filling, so scale it up or down accordingly. budget approximately 1/2 a potato per serving of shepherd’s pie.
A couple of tips to make your shepherd’s pie perfect:
1. use the widest pan you can find to allow the meat to brown. This will also make the sauce thicken up more quickly
2. Steam your potatoes for the mashed potato topping, and run them through your ricer or food mill, and then stir in the butter and half and half. You can also lighten your mashed potatoes by using buttermilk or chicken stock instead of the half and half.
3. If you are doing these as individual portions you plan to freeze, use a piping bag to pipe the mashed potatoes on top (it makes the layer nice and even and is much quicker).
4. this is a great way to use up seasonal produce – whatever produce you happen to have out of the garden or from the market. Beans and zucchini are a nice addition at this time of year.
Ingredients
- 2 T olive oil
- 3 lbs ground beef
- 4 cups onions, diced
- 2 cups celery, diced
- 4 cups carrots, diced
- 6 cloves garlic, minced
- 2 T Herbs de Provence
- 2 bay leaves
- 2 tsp salt
- 1 tsp black pepper
- 1/2 cup tomato sauce
- 2 T fish sauce
- 2 T gluten-free Worchestershire sauce or Balsamic vinegar
- 1 - 1 1/2 cups water
- 2 c frozen peas
- 1/4 cup buckwheat flour
- 6 russet potatoes
- 4 T butter
- 1 1/2 cups half and half
- 1/2 cup smoked cheddar (optional)
Instructions
- Heat the oil in a large Dutch oven over medium heat. Saute the onions until translucent and lightly browned, about 5-10 minutes.
- Add the garlic, and sweat about 30 minutes then add the celery and onions and saute another 5 minutes. Add the meat, salting as you go, and breaking up the meat as it browns.
- Add the Herbs de Provence, tomato sauce, fish sauce and Worchestershire sauce and water, and stir to mix. Add the bayleaf, cover the pot and reduce the heat and let simmer for 10 minutes until the carrots are cooked through.
- Add the frozen peas, turn the heat back up to medium-high and let cook until the peas are thawed. Then sprinkle the buckwheat flour on top and stir into the mixture, stirring as the filling heats up. It will thicken as it comes to the boil. Once thickened, remove from the heat and let cool slightly while you make the mashed potatoes.
- Preheat oven to 375 F
- Peel and cut the potatoes into large pieces. Place in a steamer basket and steam for 15-20 minutes until you can easily pierce the pieces with a paring knife. Alternately, you can boil the potatoes and drain them.
- Put the potatoes through a food mill or potato ricer. if you put the butter at the bottom of the pot or bowl you are making the mashed potatoes in, the butter will be melted by the time you are ready to stir the mashed potatoes.
- Add salt and pepper, and stir in the melted butter and half and half. if you are using smoked cheddar cheese, this is the time to add it. Dot the top with butter or sprinkle with more cheese.
- Place the filling in a pie plate, and top with mashed potatoes. Bake at 375 for 20 minutes until the filling is bubbling. Finish the shepherd's pie under the broiler to brown the top.
]]>
It seems everyone is an expert on food these days! Whether they’ve read the latest book on wheat and can espouse to you how its more evil than Satan himself, or there is handwringing about corn, or angst about conditions for chickens, or pigs, or the evils of eating meat, or people going all paleo, it seems everyone has an opinion about food these days! I don’t know if its just me hitting my crotchety middle years, but those opinions seem to be getting more and more antagonistic!
Food should be something that unites us! I know we all want to be special, and food seems to be one of those defining things these days. Perhaps its because fashion is more widely accessible, perhaps its because anybody can buy granite countertops for their kitchens at Home Depot, that diet and food are becoming the new “thing that makes us unique”! I think it was William Gibson in one of his recent novels who put forward the idea of scarcity and difficult-to-find being the hallmark of the luxury “class”. After all, just how special IS your Hermes scarf if just anyone can walk in, plunk down some moola and acquire it.
Don’t get me wrong, I cook and bake gluten-free for Christ’s sake, and I go to great lengths to ensure that what I make is safe for my celiac customers. But, that being said, there is an element of the current gluten-free mania, spurred mainly by pop-culture non-fiction books, that is sweeping the nation! And people seem to be headed in a more and more restrictive diet direction. Food seems to be becoming the new ascetisim and definition of character! … and it comes with its own paint-by-numbers templates, with cookbooks and blogs abounding telling us what to do and what to think about our food, and how to properly embrace these aspirational lifestyles (yes, I am fully aware of the irony of this statement as I type it … on my blog)
[GARD align=center]
In my opinion, food has become far more complicated than it ever needs to be for 95% of us! There was a time when people cooked three square meals a day. Food was simple, nourishing, made from scratch, and usually made without recipes! It seems we have lost our way somewhere. We’ve lost our understanding of cooking methods and techniques that allow us to look at what’s in the fridge or the garden, and come up with dinner! The fact is, when I’m cooking (as opposed to baking), I seldom use a recipe, but I do use some general methods and guidelines in terms of proportions (e.g. brown=flavour, 1 T flour will generally thicken 1 c liquid).
I think its time to take back the simplicity of food! After all, shouldn’t we just be able to enjoy some potato salad without being wracked with guilt?! </rant>
And so, dear reader, I’m thinking of starting a series of blog posts highlighting different ways of cooking things! There are only so many ways of applying heat to things to cook them, and each one of those methods has its advantages and will draw out, or transform the flavours of food in different ways! (think bake = dry heat, boil = wet heat, you get the picture). This is really helpful stuff to know if you are getting really tired of the same old pan-fried chicken breasts for dinner! or if you find yourself without a stovetop, or oven for a period of time! Try a braise next time, or poaching your chicken breasts in some stock with a bit of vermouth.
Here’s a simple one to start you off, and its perfect summertime fare because you can make up a batch of it and get out of the kitchen!
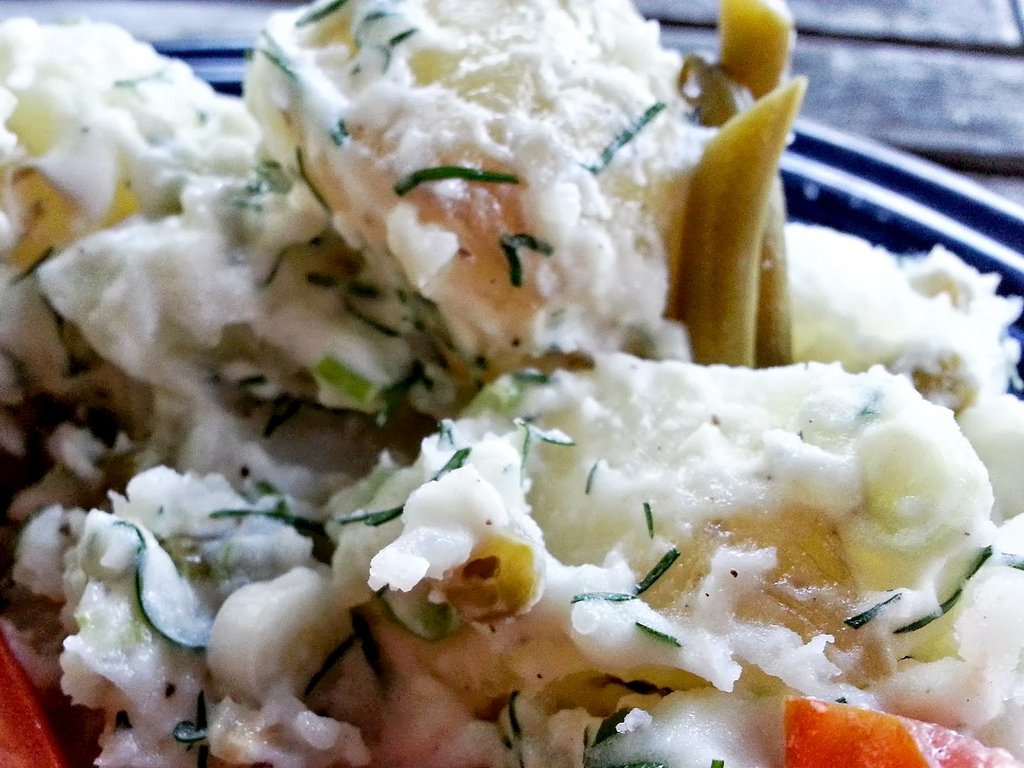
This potato salad was an impromptu add-on to our meal last night. I’ve been craving potato salad after ingesting some horrendous stuff from the supermarket last weekend on a whim (#protip – never grocery shop hungry!). As I passed by the new potatoes at the greengrocer last night, I remembered I still hadn’t had any decent potato salad, so I picked out some of the potatoes. I also happen to like dill in my potato salad, and as I was picking out a bunch, this little ladybug was perched on top — the cute factor kind of sealed the deal.
Today’s cooking method is STEAM. I know all your recipe books tell you to boil your potatoes for potato salad and mashed potatoes. I’m telling you, steam is a much gentler way of cooking your potatoes evenly, and keeping them intact! You’ll find the texture is much better as well. Boiling is such a violent way of cooking something that is really just starch molecules holding onto each other for dear life!
And in keeping with the talk of methods, think of this recipe as guidelines, not rules! If you want to add something crunchy to it like bell peppers go for it, don’t like garlic? leave it out! Because potato salad should be easy 
Ingredients
- 5-6 large new potatoes, cut in 1" dice
- 3-4 green onions, sliced
- 1 garlic clove, minced
- 1 celery rib, small dice
- 1/4 cup or so chopped pickled beans (pickles also work, use whatever tart notes YOU like!)
- 2-3 T mayonnaise
- 2-3 T sour cream
- salt and pepper
- 2 T or so fresh herbs (I like dill, chervil is also very nice, summer savoury)
Instructions
- if you are using new potatoes, just cut and place in a steamer basket. If you are not using new potatoes, try and pick something a little less starchy - red-skinned wax potatoes or Yukon golds are nice.
- Steam the potatoes 10-15 minutes until you can piece them through with a paring knife. Steaming cooks them evenly while letting them retain their shape!
- While the potatoes are still hot, place them in a bowl with everything except the mayonnaise and sour cream, and toss to let the flavours intermingle.
- When the potatoes are cool to the touch, add the mayonnaise and sour cream and toss thoroughly to combine.
When you tire of zucchini noodles for salad, and zucchini bread and zucchini muffins, and your best efforts to quell the onset on young zucchini by eating the blossoms has been foiled by those couple of zucchini now the size of baseball bats — that were hiding in plain view – there is always the tried and true stuffed zucchini to fall back on!
This is a great option, as the stuffing is really whatever you choose to make it — with or without a binder, and with whatever vegetables and seasonings strike your fancy.
For this round, I used some rice (because that is what was in the fridge), ground bison, lots of tomatoes and garlic, and chili powder and cumin. Leftover filling for this will go quite nicely in quick fajitas for lunch, or heated up as-is with a bit of cheese on top. Leave out the rice, and you have a paleo-friendly meal. Add quinoa instead of rice if that’s your thing, or even add bulgur if you eat wheat. Lamb instead of beef, with lots of fresh lemon zest, mint and zaatar would be fabulous. You can see the possibilities are endless, so I’ll stop there! Stay tuned for the next iteration of “eat ALL the zucchini”! I have an idea for zucchini jam  — SRLSY!

Ingredients
- 1 T grapeseed oil or olive oil
- 2 large zucchini, about 12" in length and 1 1/2" in diameter
- 300 grams ground bison
- 1 cup finely diced leeks
- 3 large cloves garlic, minced
- 1/2 cup celery, finely diced
- 1/2 cup carrot, finely diced
- 1/2 cup red pepper, finely diced
- 1/2 cup zucchini finely diced
- 4 roma tomatoes, finely diced
- 2 T chili powder
- 1 tsp cumin
- 1 tsp coriander
- 1 tsp sea salt
- 2 cups cooked rice
- 4-5 large basil leaves, chiffonade
- 1 cup grated Monterey Jack cheese (optional)
Instructions
- Preheat oven to 400 F.
- Preheat a large sautee pan to medium-high.
- Place the oil in the hot pan, and add the leeks, celery, carrots, and a pinch of salt, and sautee for 1-2 minutes until the onions just begin to soften.
- Add the garlic and sautee 1 minute more. Then add the chili powder, cumin and coriander, and allow the spices to toast slightly. Add the bison, and sautee until it begins to brown slightly. Add the remaining vegetables, salt and pepper, and about 1/4 c of water to prevent sticking. Reduce heat to medium-low, and cook for 8-10 minutes until the tomatoes are softened and breaking down.
- Add the rice, and stir well to bread up any clumps. Cook, covered for another 2-3 minutes to allow the rice to absorb some of the flavours, and finally stir in the basil off the heat.
- While the filling is cooling slightly, cut the zucchini in half lengthwise, and scoop out the seeds to make a trough. Fill the zucchini with filling. Top with grated cheese if desired. Bake at 400 degrees for 25 minutes.
]]>
 So summer is finally here! and none too soon. While the rest of North America has found itself in the firm grip of a heat wave (and in some areas, a full-on drought!), the West Coast has been moisture-laden up until the last week. Farmers on the fruit side of things were despairing as strawberries were going mouldy on the vine, and blueberry growers were understandably concerned at the impact that lack on sunshine was going to have on their harvest.
The good news is that the sunshine has arrived, and now that we on the Wet Coast have joined the ranks of summer sun-lovers, we are all looking for ways to spend less time over a hot stove!
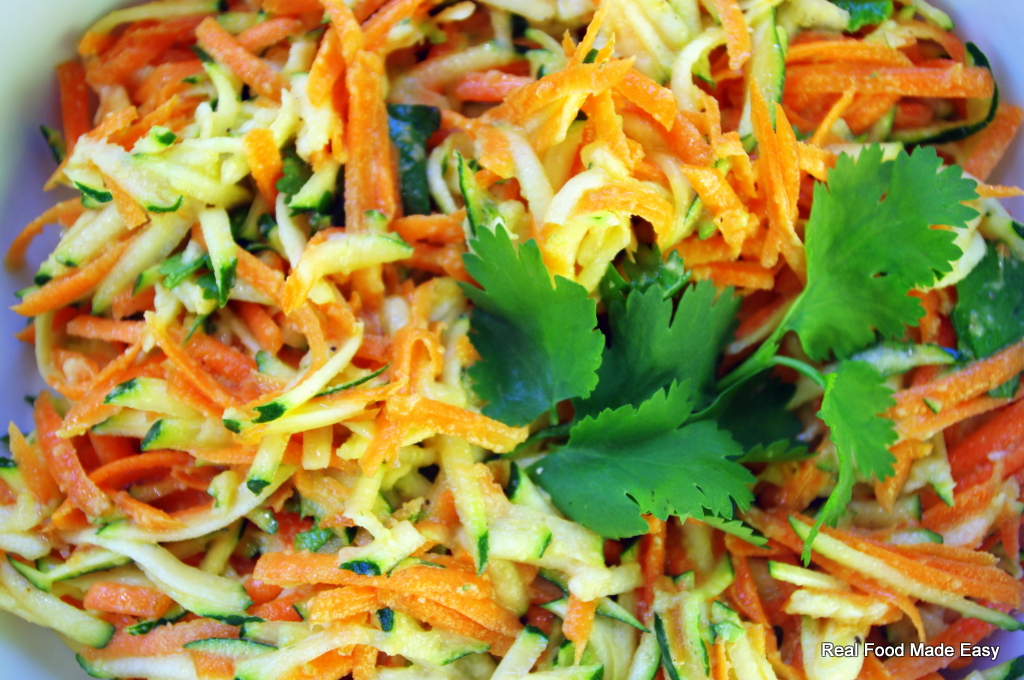
With no cooking required, this side dish fits the bill perfectly! The dressing was actually the jumping off point — you only need a small amount for this, the remainder will keep quite happily in the refrigerator for all impromptu summer salad snacking.
To make up this side dish, merely combine 1 cup grated carrot with 1 cup grated zucchini, and 2T or so roughly chopped cilantro with 3-4 T of Honey Ginger Dressing. Toss to combine, and let sit about 10 minutes or so before serving. (serves 3-4)
Ingredients
- 1/4 cup rice vinegar (or a good quality white balsamic vinegar to be SCD-legal)
- 1 cup grapeseed oil
- 1 tsp sea salt
- 1/2 tsp coarsely ground black pepper (or more to taste)
- 3-4 cloves garlic, minced
- 1/4 cup grated ginger (grated on a box grater)
- 2 T honey (or to taste)
Instructions
- Combine all ingredients in a 4 cup liquid measuring cup or mixing bowl.
- Use an immersion blender to thoroughly blend all ingredients together. The grated ginger will help produce an emulsified dressing, with the final product becoming quite light in colour and creamy looking
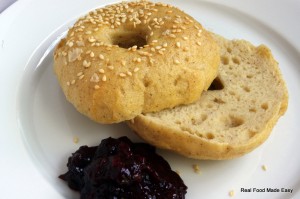 This recipe for gluten-free bagels was borne out of two things: a desire to create something without dairy or eggs; and, some mucking around with the gluten-free wild yeast starter I have going. I had tried a number of recipes and variations, but really only ended up with round bread with holes. Bagels in shape only :(. Most iterations ended up with the same texture … too soft, and lacking that chew that a true Montreal-style bagel has. I am in that camp that is zealous in their belief that a REAL bagel needs to be boiled, and should have a chararacteristic chewy crust and interior!
All appeared to be lost until one day, I made a baguette with the wild yeast starter I had grown … and if I might say, my socks were knocked off! And so, this bagel recipe was borne! Gluten-free, dairy-free, egg-free, and no commercial yeast! these are so tasty you’ll never miss what’s missing.
This recipe is fairly involved, as you need to have a healthy wild-yeast starter going, and fed up a couple of days in advance. To make the starter, take about 4 T of the flour mix, combined with 4T of spring or distilled water, and leave it out to “catch” the wild yeast in the air. Once it starts to bubble (after 18-24 hours), feed it with 2T of flour plus 2T of water daily, until it grows in volume. To get it growing, feed it about 1/3 the total volume with flour and water. When you are not using it, you can store the starter in the fridge.
Once you have it going, you can also use it for all kinds of bread-like things! It adds great flavour to any bread recipe, but also makes great pancakes and waffles. These bagels rely entirely on the wild yeast for their rise, so if you are going to make them, take the starter out of the fridge at least 48 hours before using, and feed it every 12-18 hours (it should be fed at least 2x in order to have happy wild yeasties!)

Ingredients
- 450 grams gluten-free starter
- 75 grams tapioca starch
- 75 grams cornstarch
- 75 grams millet flour
- 38 grams sorghum flour
- 38 grams sweet rice flour
- 1 T sugar or honey
- 3/4 tsp. salt
- 1 1/2 tsp guar gum
- 1 T xantham gum
- 1 T grapeseed oil
- 225-250 ml water
Instructions
- Combine all the dry ingredients in a medium bowl and mix well to combine the gums thoroughly with the flours.
- Measure out the 450 ml of starter into the bowl of a stand mixer. Add the oil and 225 ml of water, and then the dry ingredients, and mix with the paddle attachment at medium speed until the dough is very smooth. Add the remaining water to achieve a texture similar to a thick cake batter.
- Using a large ice cream scoop, portion out the dough into 8 equal rounds on parchment paper. Flatten each round slightly (rounds should be about 7 cm across). THEN poke your finger in the middle of each to create the bagel hole.
- Cover with plastic wrap and let rise for at least 60 minutes.
- In the meantime: Heat some water to a simmer in a Dutch oven. Add 2 T cane sugar and 1 T baking soda. At the same time, preheat the oven to 450 F.
- Cut the parchment around each bagel, and place them in the water bath (parchment side down -- it will detach when you flip them in the water). Boil for 30-60 seconds, then flip. When the bagels float to the surface, remove with a slotted spatula, and place on a parchment-lined baking sheet.
- if you want extra glossy bagels, you can brush with tapioca gel. Sprinkle with sesame seeds or poppy seeds, if desired.
- Bake at 450 F for 25-30 minutes
Notes
Sourdough starter is created and fed with the following flour mix: 600 grams brown rice flour 600 grams sorghum flour 600 grams millet flour 300 grams sweet rice flour 160 grams garfava flour 75 grams black bean flour
Fortunately, we had some strawberries waiting in the fridge, and some creme fraiche, handy — the basis for the most delicious strawberries and cream ever!
Nothing says Valentines like strawberries, but unfortunately, the gorgeous looking strawberries that come up from California at this time of year are usually devoid of flavour, and need a little help. A quick gratin solves all those woes!
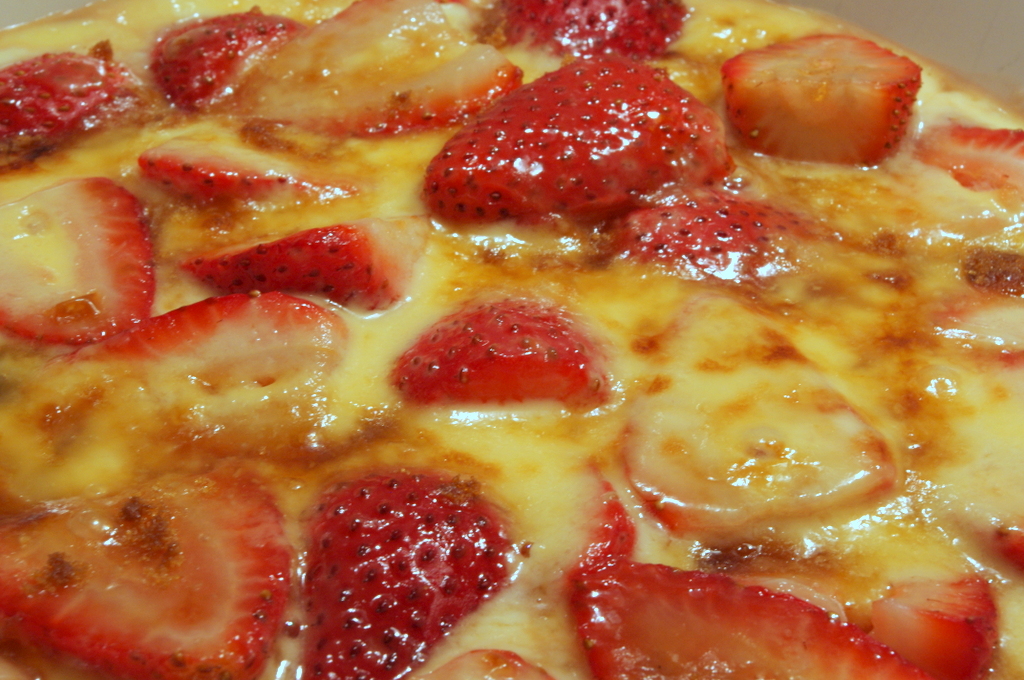
Ingredients
- half pound strawberries, washed, hulled and sliced
- 1 Tablespoon brandy
- 3-4 Tablespoons creme fraiche
- 4 Tablespoons light brown sugar (2 for the strawberries, 2 for the creme fraiche)
Instructions
- At least 1-2 hours before you will serve the gratin, hull and slice the strawberries. Toss with 2 Tablespoons light brown sugar, and the splash of brandy. Let macerate for at least 1-2 hours.
- Turn on the broiler element for your oven.
- Mix the creme fraiche with 1 Tablespoon light brown sugar
- In a shallow, heatproof dish, spread most of the creme fraiche mixture. Layer the strawberries on top (in a single layer). Drizzle the remaining creme fraiche over the top, and sprinkle the remaining 1 T brown sugar over the top.
- Place as close to the broiler element as you can, for approx 3 minutes, until the sugar is bubbling and beginning to brown.
- Serve!
]]>
Winter is almost upon us, and I've been reading through Michael Ruhlman's new book Ruhlman's Twenty which is a recipe book that is really more about working from basic techiques. And so, with thoughts of the benefits of hot water and its extractive powers, AND faced with this sitting in my fridge…
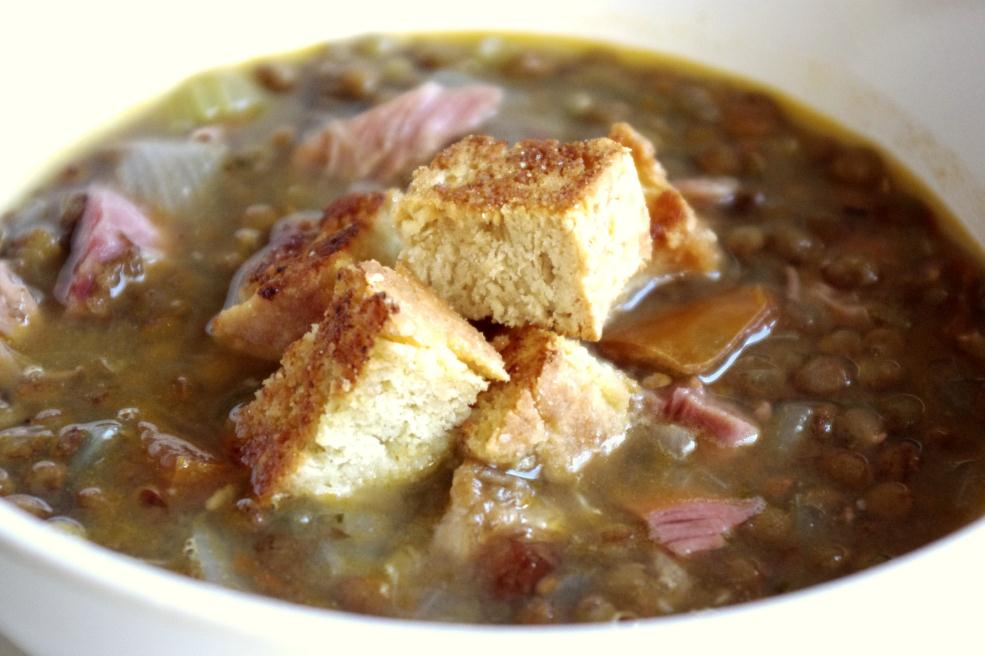
… lentil soup is born!
These are guidelines more than a recipe, and are easily changed (more veg, less meat, different legumes, substitute barley for legumes, lamb legbone instead of the pork hock … the combinations are infinite, and limited only by the flavour combinations that work for you!). Go forth, and make some soup for dinner. Its good for the body, good for the soul!
Take 1 smoked pork hock (this one was not too heavily salted) cook in enough waterto cover AND 1 onion, 2 stalks celery, 1 large-ish carrot in a pressure cooker, about 30 mins until the meat comes off the bone. This made about 8 cups of smoked pork hock stock. Set the pork hock aside while you get the rest of the soup going.
In the pressure cooker, sautee 1 large onion, 2-3 cloves garlic, 2-3 stalks celery in some oil (salt as you go) until the onions are translucent, add 1 diced tomato (it was in the fridge, needing to be used up!), 1 cup dried lentils de puy. Add 6 cups of the smoked pork hock stock, 2 tsp dried herbs de provence, 2 bay leaves, cook at high pressure for 35-45 minutes.
Shred the meat off the smoked pork hock, add back into the soup. Adjust salt as needed. I like to season at the end with 1 T balsamic or sherry vinegar for a hint of acid.
]]>