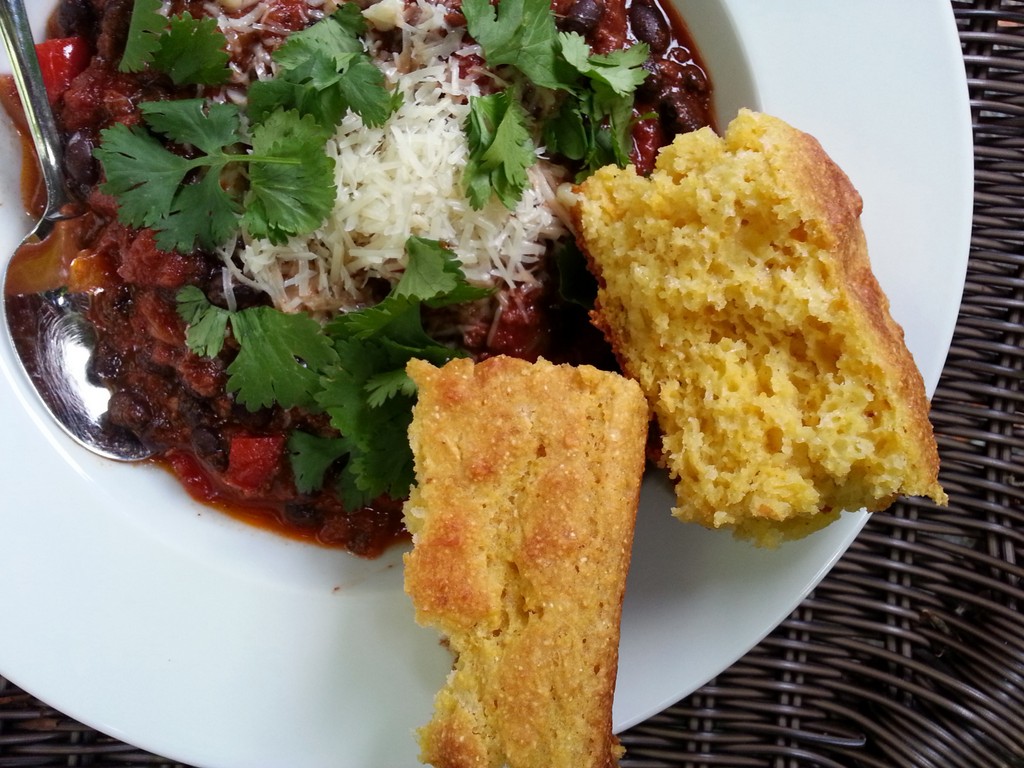
 For some reason I thought I had posted this cornbread recipe, but apparently not! I’ve made it so often since developing the recipe I just assumed I had, so when Shinae Robinson announced her November Cookalong over on Google+ included corn muffins, I came here to find the recipe … and nothing! So in the interests of having some tasty gluten-free muffin options to go along with her November Chorizo Chili, Squash soup and Corn muffin cookalong I offered up my recipe for Buttermilk corn muffins.
Just a bit of blather here before I launch into the recipe itself … I happen to love moist fluffy cornbread, and prior to creating this recipe, most of the GF versions I had seen were either the dense, cooked in a cast iron skillet versions, OR they were quite cakey, not very corn-like, and tended to become quite dry and crumbly on sitting out for a day. I was after that kind of cornbread that uses a tin of creamed corn in it! however, most creamed corn is actually not GF, due to the modified cornstarches they contain (NOTE: any modified starch in an ingredients list is a keyword for those needing a safe GF product!). So my starting point when thinking about how to get maximum corn flavour, was to start with actual corn!
Anyhoo, we’ve recreated that creamed corn content by blitzing some thawed frozen corn niblets with all the other wet ingredients in a blender … and I have to say it works brilliantly. This batter is quite sloppy, but don’t despair, it will bake up nice and tall and fluffy and moist. Instructions in the recipes are for an 8″ square pan, but you can also bake these in muffin tins or tiny loaf pans – use a #12 scoop to portion it out, and check for doneness starting at 18-20 minutes.
This uses a bread flour blend that I use in a number of my baking recipes, so if you see things in my feed you like, note that I’m testing as many of my baked goods recipes as I can with this blend with the plan of publishing them shortly (buckwheat muffins, this cornbread, upside-down cake, Liege waffles, biscuits – to name a few off the top of my head). Now go, check out the cookalong – ask to join the Google+ Cookalong Community, and in the words of the Chairman – ALLEZ CUISINE!

Ingredients
- 1 cup GF Janice's bread flour blend* or another good GF flour blend without gums (144 grams)
- 1 cup cornmeal (Bob's Red Mill or El Peto are my favourites)
- 2 T granulated sugar
- 1/2 tsp xantham gum
- 1 tsp baking soda
- 1 tsp double acting baking powder (Bob's Red Mill or Fleishman's are both good GF options)
- 3/4 tsp salt
- 1 cup buttermilk
- 2 eggs
- 2 T melted butter or oil
- 1 1/2 cups corn niblets (frozen and thawed is fine)
Instructions
- Preheat oven to 350 degrees
- Line an 8" square pan with parchment paper
- Combine all the dry ingredients in a medium bowl and whisk well to combine everything.
- Put the buttermilk, eggs, butter or oil and corn in a blender and blitz until the corn is broken down and pureed with all the other wet ingredients.
- Pour the contents of the blender into the bowl with the dry ingredients and mix with a spatula or flat whisk to fully incorporate everything. The batter will be a bit wet - the consistency of a thick pancake batter.
- Bake for 25-30 minutes until the centre springs back and the edges just start to pull away from the sides.
- Let cool on a rack for at least 30 minutes before cutting,
Notes
*Janice's bread flour blend combine in a bowl and mix well with a whisk. Store in an airtight container or ziploc bag 1 cup brown rice flour 1 cup potato flour 2 cups sorghum flour 2 cups garfava flour 6 cups potato starch 6 cups tapioca starch
OR another good flour blend for this is: 1 cup garfava flour 1 cup raw buckwheat flour (blitz raw buckwheat groats in a spice grinder) 1 cup potato starch 1 cup tapioca starch
 Another February is upon us, and with it, comes Imbolc … that time of year exactly midway between the Winter Solstice and Spring Equinox when the days start to get longer, sun-seeking rodents (Wiarton Willie for those of us here in Canada), and for sports fans … Superbowl Sunday!
This weekend has become something of a gathering point for folks — even those who aren’t sports fans. Perhaps its because we’re edging out of winter and need an excuse to gather and eat, perhaps its just because the festivities of Christmas are just far enough behind us to be fond memories. Whatever the reason, “The Big Game” has become a traditional rallying point, replete with all manner of meaty treats and finger food.
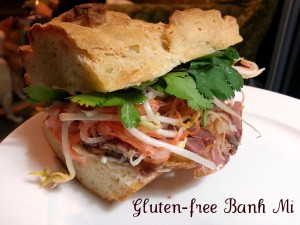
Unfortunately for those avoiding gluten, it can feel like there is little choice available. Many of the boxed treats come pre-breaded and fried, dips are served with bread or wheat-crackers, and even if gluten-free options are available, it can be a nightmare of cross-contamination! So what to do?! Banh mi is a great party-food option, and its quite easy to make gluten-free! All of the typical fillings are easy to purchase or make in advance, and I’ve got a bread recipe that requires no special mixer, and works well as a French Bread roll!
I’ve served banh mi as a party food at a couple of catered events I’ve done, and people really like being able to pick and choose their toppings. For those limiting their carb intake, they can opt for an open-face version. Just remember, its that magical combination of cured meats, with the crisp sweet/sour zing of the pickle, and the crunch of cucumber all together that make these such a satisfying snack option.
Typical meat fillings include:
- pork terrine or pate (if you get a good quality one from a local charcuterie, it should have NO fillers — but always ask about ingredients and production!)
- headcheese, or my favourite trotterbrawn
- meatloaf – you can make this ahead of time, with asian spices. If you want to add filler while keeping it gluten-free, just use gluten-free bread crumbs, or my favourite, cooked quinoa!
- thin-sliced cold cuts (my favourite — but not at all traditional, is Mortadella!)
- BBQ pork
- sliced omlette
- marinated and sauteed chicken
- marinated and braised tofu
Other toppings that are traditional:
- pickled carrot and daikon (shred equal amounts of carrot and daikon. For every 1 c, add 2 T rice vinegar, 2 T sugar, and 1/2 tsp salt)
- cilantro sprigs
- mint leaves
- other herbs such as basil
- cucumber slices
and finally, the condiments
- traditional banh mi has a slathering of plain old mayonnaise – NOT aoil, and NOT gussied up mayonnaise with fish sauce in them. Basic banh mi actually start with mayonnaise cut with softened butter, BUT I have to say I really like the Japanese squeezy-bottle mayo in mine — its a little bit sweet and a little bit tangy which plays well off the rich meats.
So finally, dear folks we get to the bread, which is the crux of the banh mi. While we won’t be making something that is as feathery and light as the traditional wheat/rice french bread rolls that are typical of some of the best banh mi, we will be making something that is nice and soft when fresh or toasted in the oven, AND completely gluten-free. For those of you looking for something a little more wholesome, I’ll have a whole-grain version for you in the next blog post, with amaranth, sorghum and millet flours. This bread is done as a no-knead style bread — while it won’t be quite as fluffy as a more delicate bread, it will still be plenty soft on the inside, with a bit of a chewy crust on the outside. You will mix the dough, cover with plastic wrap and walk away for about 2 hours, then form the loaves or buns, let rise another 30-45 minutes and bake. By trading time for effort, you are allowing the gum and flours to fully hydrate, which, fwiw, takes more time than wheat breads.
So here you go, French bread for all! I hope you and yours have a great game-day 
... for your Banh Mi Superbowl Party!
Ingredients
- 1/2 cup sweet rice flour
- 1/2 cup white rice flour (finely ground)
- 1/2 cup almond flour
- 1 cup brown rice flour
- 1 cup tapioca starch
- 1 T xantham gum
- 1 tsp seasalt
- 2 T sugar or honey (honey will help keep the rolls moister)
- 1 tsp baking powder (optional)
- 2 1/2 tsp instant yeast
- 2 eggs, whisked
- 1 1/2 cups water
- 1 tsp cider vinegar (optional)
Instructions
- Combine all the dry ingredients in a large bowl and whisk to combine
- Make a well in the centre and add the wet ingredients. Whisk them all well to combine before beginning to incorporate the dry ingredients.
- Stir and fold everything together until it comes together. Give it a couple more stirs, and then cover with plastic wrap.
- Let rise for 2 hours at room temperature.
- Line a French bread pan with parchment paper. Scoop out the dough into the pan the length of the loaf you want, and smooth out the top and sides with a wet spatula. Cover with plastic wrap and let rise another 30-45 minutes.
- 10 minutes before you are ready to bake, Preheat the oven to 425 degrees.
- Remove the plastic wrap and slash the tops of the loaves -- this will help control the direction in which they expand in the oven.
- Bake on the lowest rack in the oven at 425 degrees for 30-35 minutes. The loaves should be browned, and register 205F internally,
- Let cool in the pan 5 minutes, then remove to a cooling rack -- they will be ready to slice and eat after 30 minutes of cooling.
Notes
to make this loaf egg-free, simply omit the eggs, and add 1 tsp pectin powder to the dry ingredients (I use Pomona's pectin, and for baking just mix the contents of both pouches). Also increase the amount of water to the mix by about 1/2 cup.