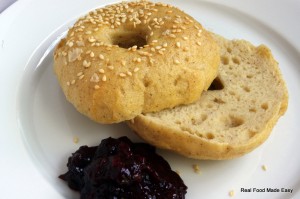
You asked for it! You got it!
 This recipe for gluten-free bagels was borne out of two things: a desire to create something without dairy or eggs; and, some mucking around with the gluten-free wild yeast starter I have going. I had tried a number of recipes and variations, but really only ended up with round bread with holes. Bagels in shape only :(. Most iterations ended up with the same texture … too soft, and lacking that chew that a true Montreal-style bagel has. I am in that camp that is zealous in their belief that a REAL bagel needs to be boiled, and should have a chararacteristic chewy crust and interior!
All appeared to be lost until one day, I made a baguette with the wild yeast starter I had grown … and if I might say, my socks were knocked off! And so, this bagel recipe was borne! Gluten-free, dairy-free, egg-free, and no commercial yeast! these are so tasty you’ll never miss what’s missing.
This recipe is fairly involved, as you need to have a healthy wild-yeast starter going, and fed up a couple of days in advance. To make the starter, take about 4 T of the flour mix, combined with 4T of spring or distilled water, and leave it out to “catch” the wild yeast in the air. Once it starts to bubble (after 18-24 hours), feed it with 2T of flour plus 2T of water daily, until it grows in volume. To get it growing, feed it about 1/3 the total volume with flour and water. When you are not using it, you can store the starter in the fridge.
Once you have it going, you can also use it for all kinds of bread-like things! It adds great flavour to any bread recipe, but also makes great pancakes and waffles. These bagels rely entirely on the wild yeast for their rise, so if you are going to make them, take the starter out of the fridge at least 48 hours before using, and feed it every 12-18 hours (it should be fed at least 2x in order to have happy wild yeasties!)

Ingredients
- 450 grams gluten-free starter
- 75 grams tapioca starch
- 75 grams cornstarch
- 75 grams millet flour
- 38 grams sorghum flour
- 38 grams sweet rice flour
- 1 T sugar or honey
- 3/4 tsp. salt
- 1 1/2 tsp guar gum
- 1 T xantham gum
- 1 T grapeseed oil
- 225-250 ml water
Instructions
- Combine all the dry ingredients in a medium bowl and mix well to combine the gums thoroughly with the flours.
- Measure out the 450 ml of starter into the bowl of a stand mixer. Add the oil and 225 ml of water, and then the dry ingredients, and mix with the paddle attachment at medium speed until the dough is very smooth. Add the remaining water to achieve a texture similar to a thick cake batter.
- Using a large ice cream scoop, portion out the dough into 8 equal rounds on parchment paper. Flatten each round slightly (rounds should be about 7 cm across). THEN poke your finger in the middle of each to create the bagel hole.
- Cover with plastic wrap and let rise for at least 60 minutes.
- In the meantime: Heat some water to a simmer in a Dutch oven. Add 2 T cane sugar and 1 T baking soda. At the same time, preheat the oven to 450 F.
- Cut the parchment around each bagel, and place them in the water bath (parchment side down -- it will detach when you flip them in the water). Boil for 30-60 seconds, then flip. When the bagels float to the surface, remove with a slotted spatula, and place on a parchment-lined baking sheet.
- if you want extra glossy bagels, you can brush with tapioca gel. Sprinkle with sesame seeds or poppy seeds, if desired.
- Bake at 450 F for 25-30 minutes
Notes
Sourdough starter is created and fed with the following flour mix: 600 grams brown rice flour 600 grams sorghum flour 600 grams millet flour 300 grams sweet rice flour 160 grams garfava flour 75 grams black bean flour
Latest posts by Janice (see all)
- A Real Food Manifesto - June 27, 2015
- Strawberry Preserves, French style - June 16, 2015
- Gluten-free All Purpose Blends: Intro - June 7, 2015
